Star Tracker
How do you get beautiful colourful images of the Milky Way and images of smaller targets in the sky?
With a star tracker! To learn more about purchasing a tracker watch my video here.
Links on this site may be affiliate links that Kristine Rose Photography will earn a small commission on at no extra cost to you. Purchasing through affiliate links helps creators keep creating free content for you!
Wide Field Only
If you only want to track images using a wider focal length I recommend the Move Shoot Move (MSM)
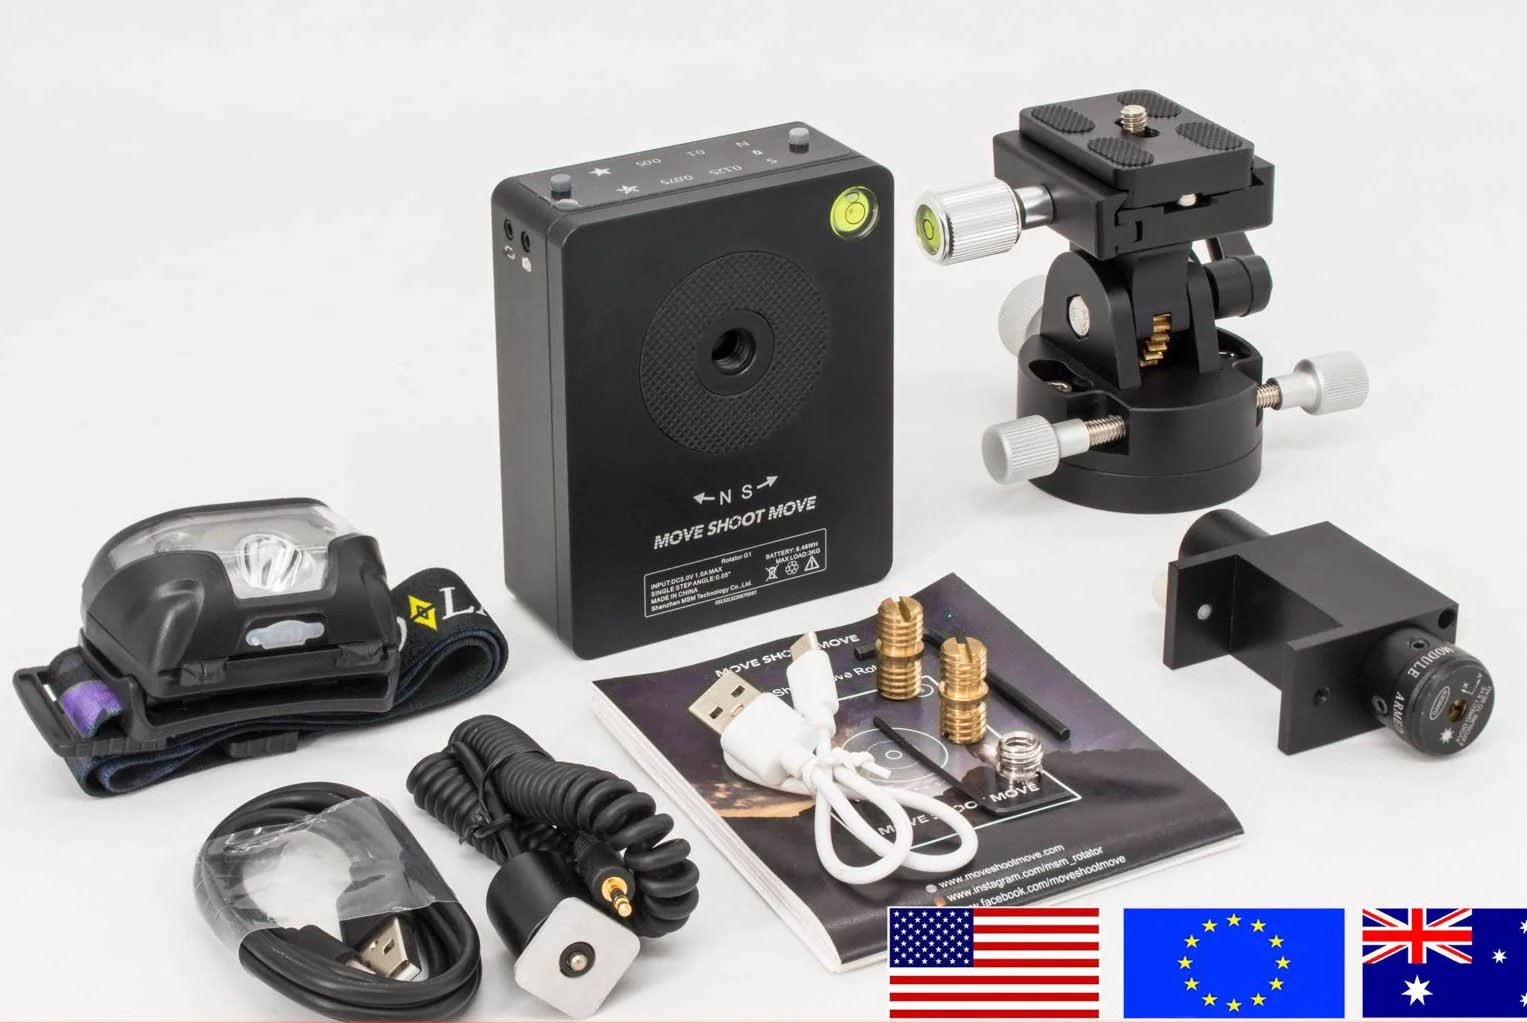
Move Shoot Move
I recommend going with Pro Kit B - that comes with the Rotator, Wedge and Laser Pointer. If you cannot legally use a laser pointer where you live, please get Pro Kit A.
Let’s talk a bit about the MSM. I do own and use one.
Pros: It is exceptionally light and lightning fast to polar align with the laser. This makes it an attractive unit to use. Especially for anyone hiking or travelling.
Cons: In comparison to the iOptron and Sky-Watcher the build quality and quality control on the units is exceptionally lacking. If you purchase one please test it- I have had many students have issues and need to return theirs. This may be something that improves the longer the company is running.
And if you want to shoot anything with a focal length longer than 50mm I do not recommend the MSM.
It IS possible, but it is not fun. You will find you have inconsistent results and it is very frustrating.
The MSM works best with light cameras. I have had students who has issues getting longer tracking with a Nikon D750 and 14-24mm f2.8 because it weighs a lot (even though it’s a wide angle)
I recommend the MSM for anyone wanting a light unit who only plans to take wide angle Milky Way images with a lighter camera.
Wide Field and Deep Sky Objects
This is where things get exciting! And mmmaayyybbbee a bit frustrating (but I do have a course on using these that I’ll be relaunching in 2022! Just saying).
When you get your first image of a Deep-Sky Object it is absolutely exhilarating! And to do that, you need a good tracker.
These trackers are “lightweight” enough to hike in places and use them, but sturdy enough to get long exposures.
Using one of these trackers is a bit of a gateway drug. I’m not saying you’re going to start buying scopes and a whole host of other gear, but I’m also not saying it hasn’t happened. You’ve been warned.
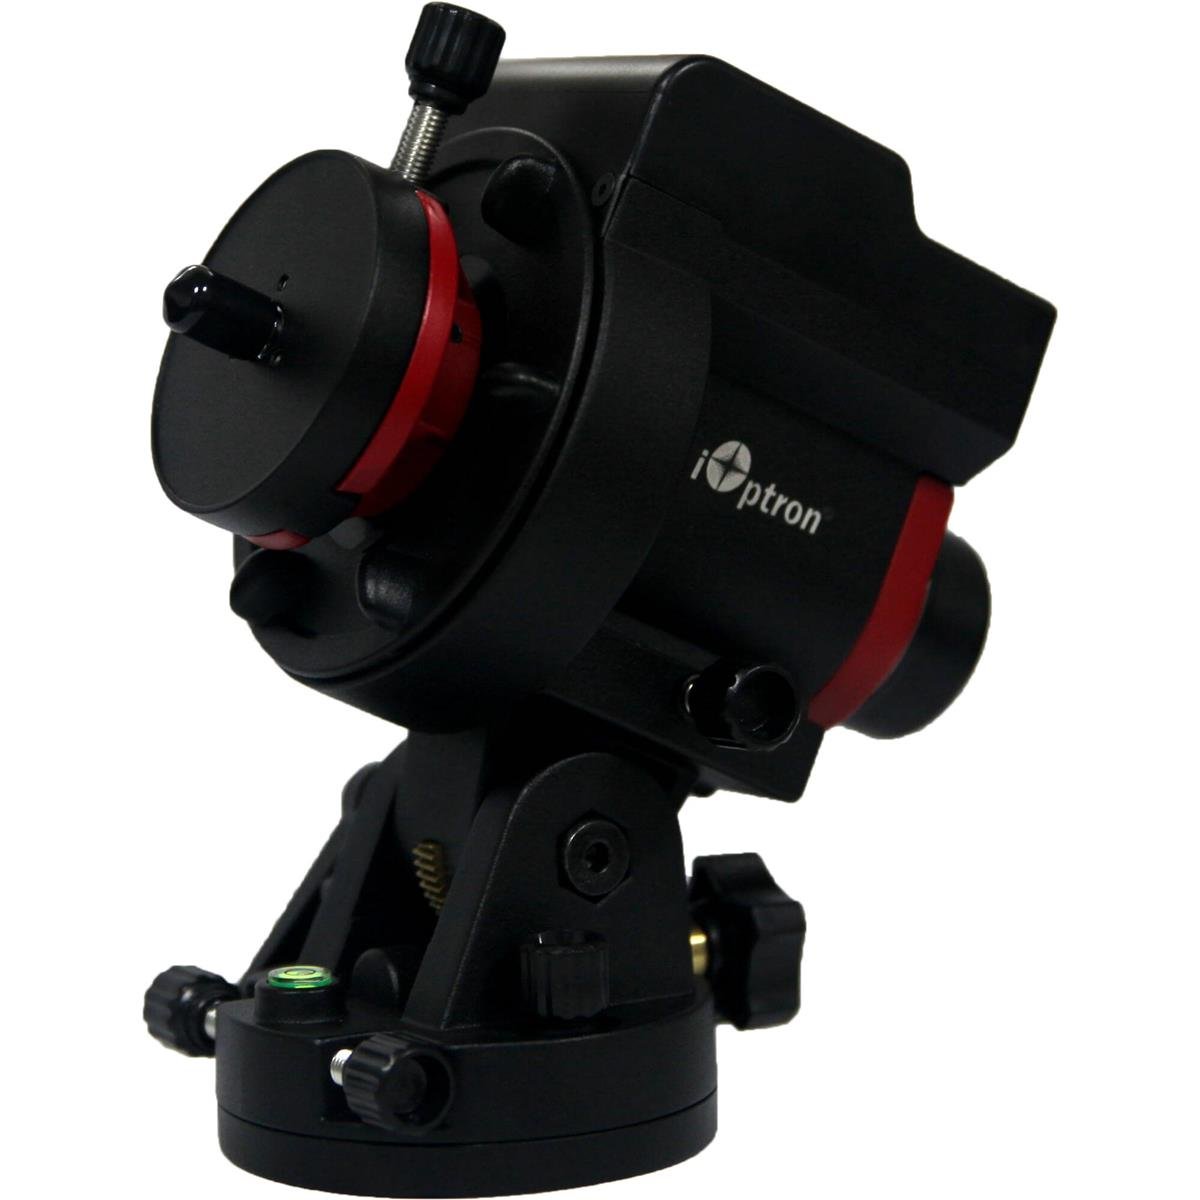
iOptron Skyguider Pro
This is my main mount and I love it. This thing is an absolute workhorse.
Hypothetically speaking, this tracker will still work perfect if it gets knocked over and hits a granite rock instead of the sand that was everywhere (except the one rock) .. not that I’m talking from experience or anything.
This holds a payload of 11lbs. Make sure to take into consideration the counterweight (2.5lbs) and your tripod head in addition to your camera body and lens.
This vs the Sky-Watcher? I’ve used both, and they are both great. The new Sky-Watcher has wifi which might be nice. But my iOptron is red, which I like.
Yes, I am making decisions based on aesthetics.
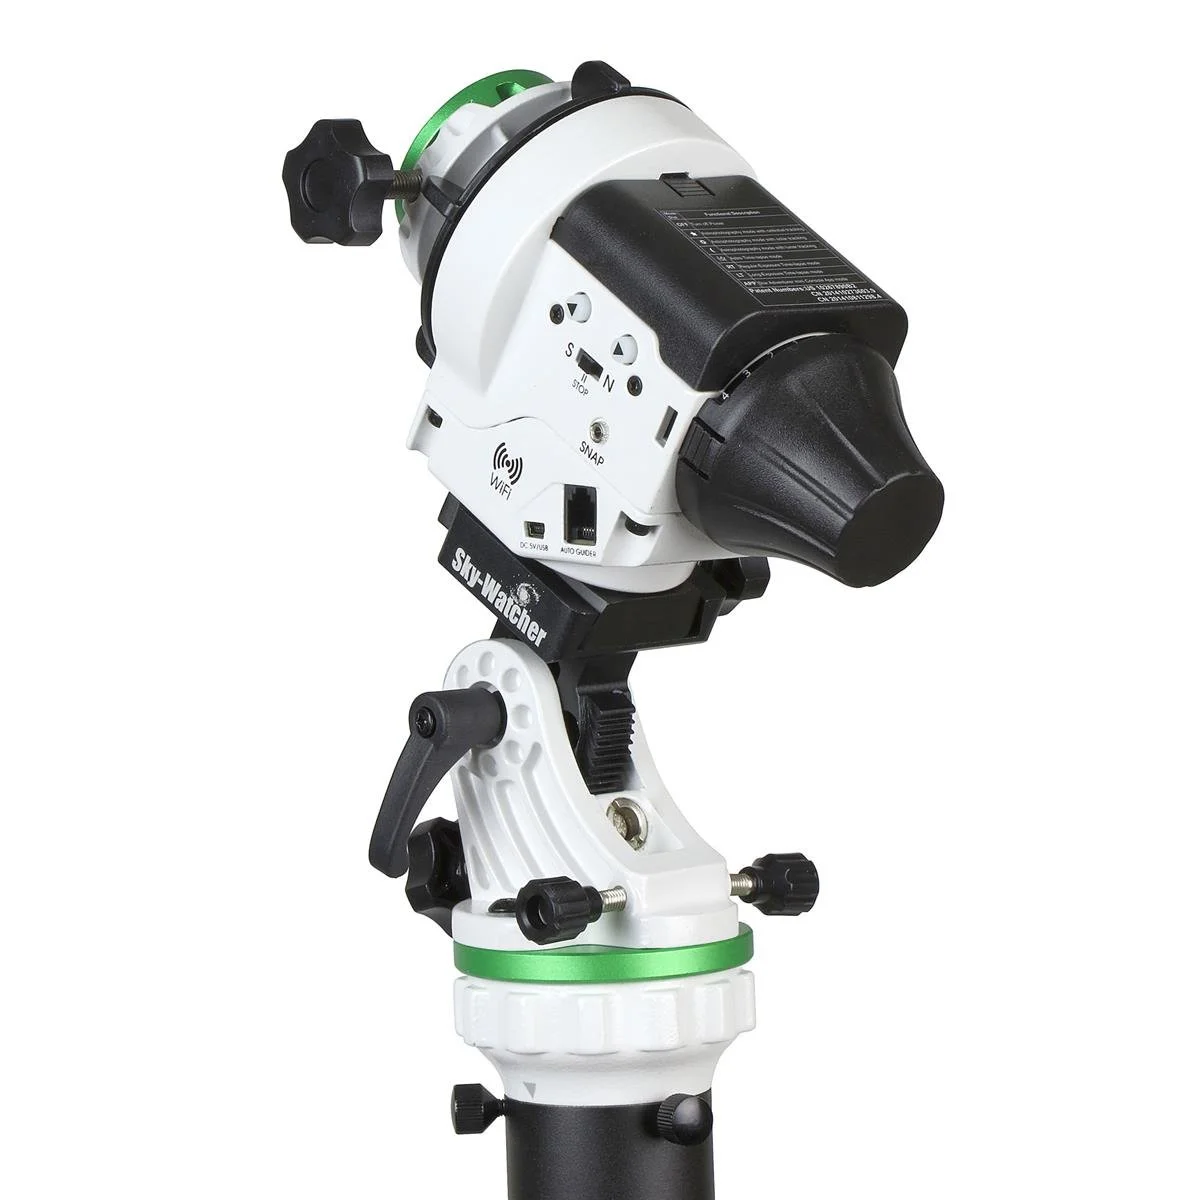
Sky-Watcher Star Adventurer 2i
This is similar to the iOptron. It has an 11lb payload as well.
The one benefit this has is wifi, which could be useful if you are setting it up in your yard and shooting from inside the house doing a timelapse or something similar. Do I think the wifi would be crazy useful out in the field with how I normally shoot? Probably not, but there’s no detractor having it.
Accessories
You will find there are A LOT of things you can buy to trick out your tracker.
These are the things that I have found the most useful.

High Latitude WO Vixen style base mount
A significant upgrade on the wedge bases included with any of the above trackers.
It adjusts from 32~59 degree (Latitude)
This base is sturdy AF and is a dream to use to polar align.
It also weighs a million pounds, you will notice the extra weight from this in your bag. However if you live at a higher latitude (I’m at 45˚) you will find it works much better.

Extension Bar for iOptron Skyguider Pro
For some of your heavier lenses you may need the extension bar to counterbalance the weight better.
A note here, it is preferable to have the counterweight closer to the tracker.
However, adding an additional counterweight may put you over the payload limit of your tracker- that’s where this extension bar comes in.
My last two recommendations come without links as they are always changing with their availability online.
A right angle viewfinder for your polar scope. This can help save your knees and neck! They tend to be elusive to find online and expensive, but many of my students swear by them.
A laser pointer. I use the one that came with my MSM, but any safe laser pointer will do (check your local regulations) This will make it crazy easy to know which star is Polaris while polar aligning.