Milky Way Exposure Comparison
Here is the question I get more than almost any other:
"What camera do you use?"
What they are really asking is, what camera do I need to get photos like yours? I get it. A Milky Way image with real depth and colour looks like it came from equipment you do not own.
But in reality, it’s not the gear, but understanding how to use the gear.
Let’s look at one piece of the puzzle in this post. I took these photos as an experiment when I was on a rural roadside deep in Vermont.
Same everything, except time
Every frame below: Nikon Z6 II, Sigma 28-45mm f/1.8, f/1.9, ISO 800.
Same night, same sky, same target.

At this size they look pretty similar. A little brighter as you move right.
This is exactly why so many people stop at 15 seconds and assume they have what they need. On a phone, in a Facebook group, the 8 second frame (far left) looks fine.
It is not fine. It is just small.
Now look closer…
Here is each photo full screen:
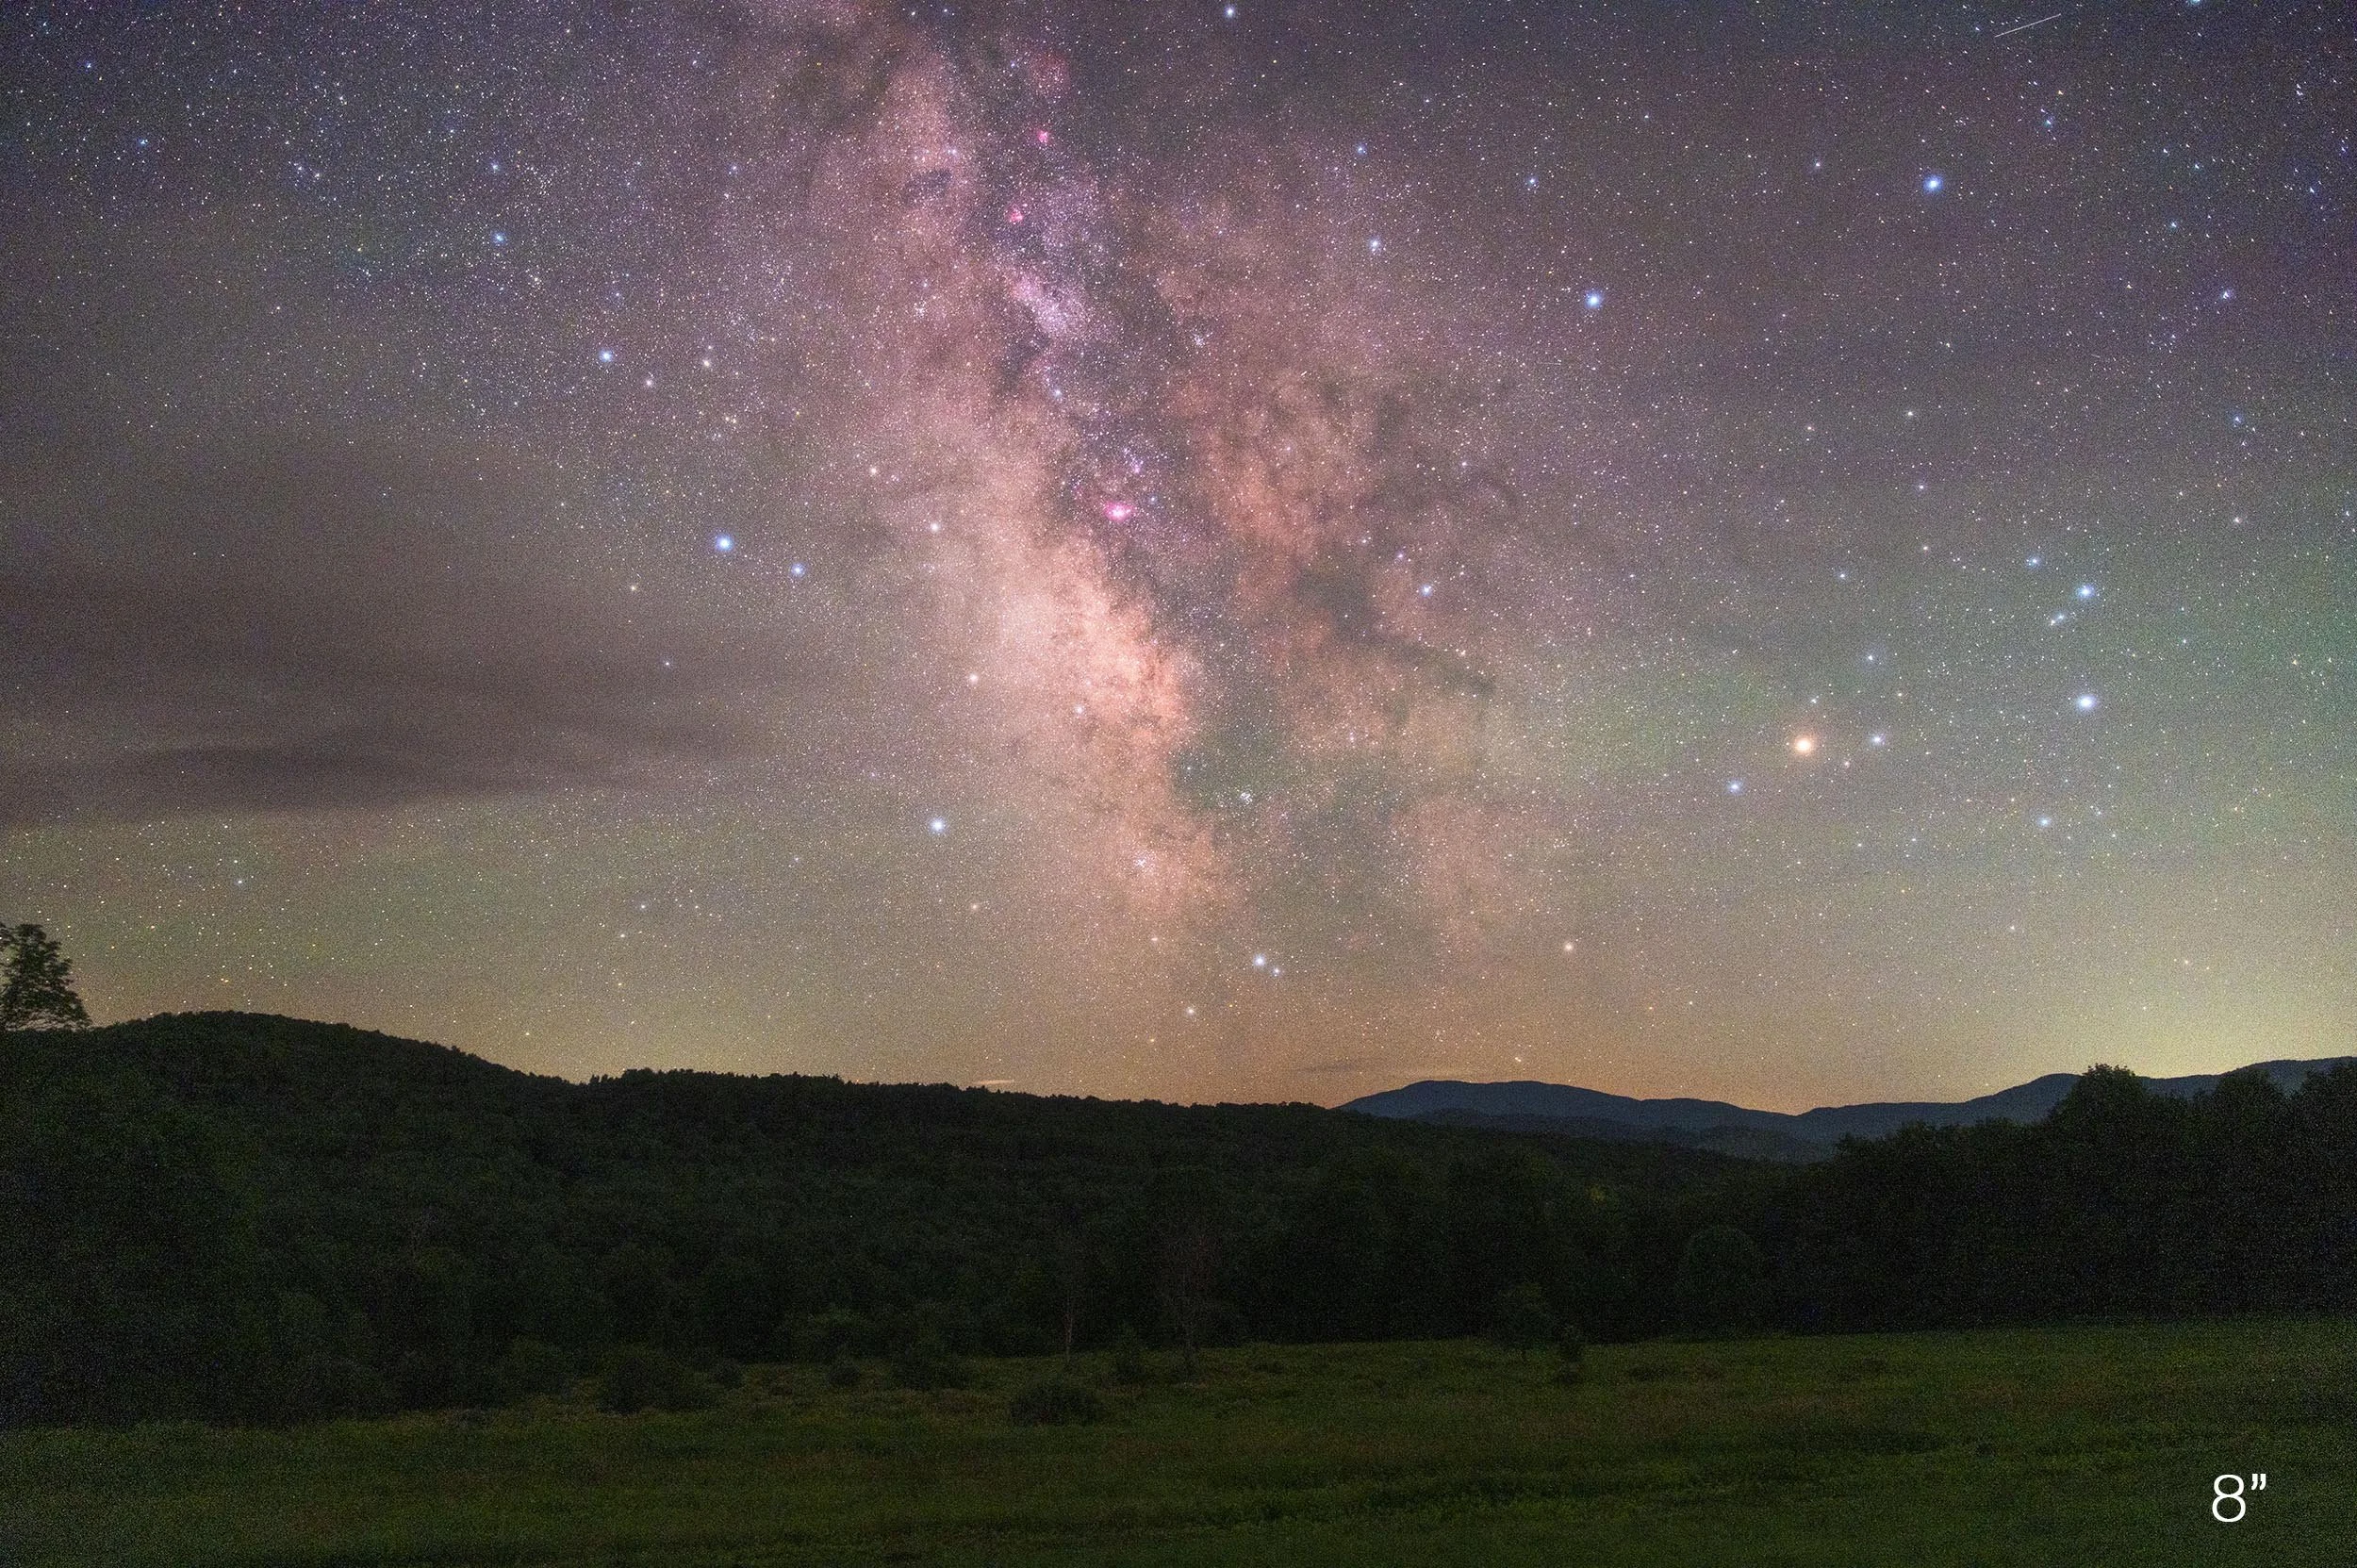
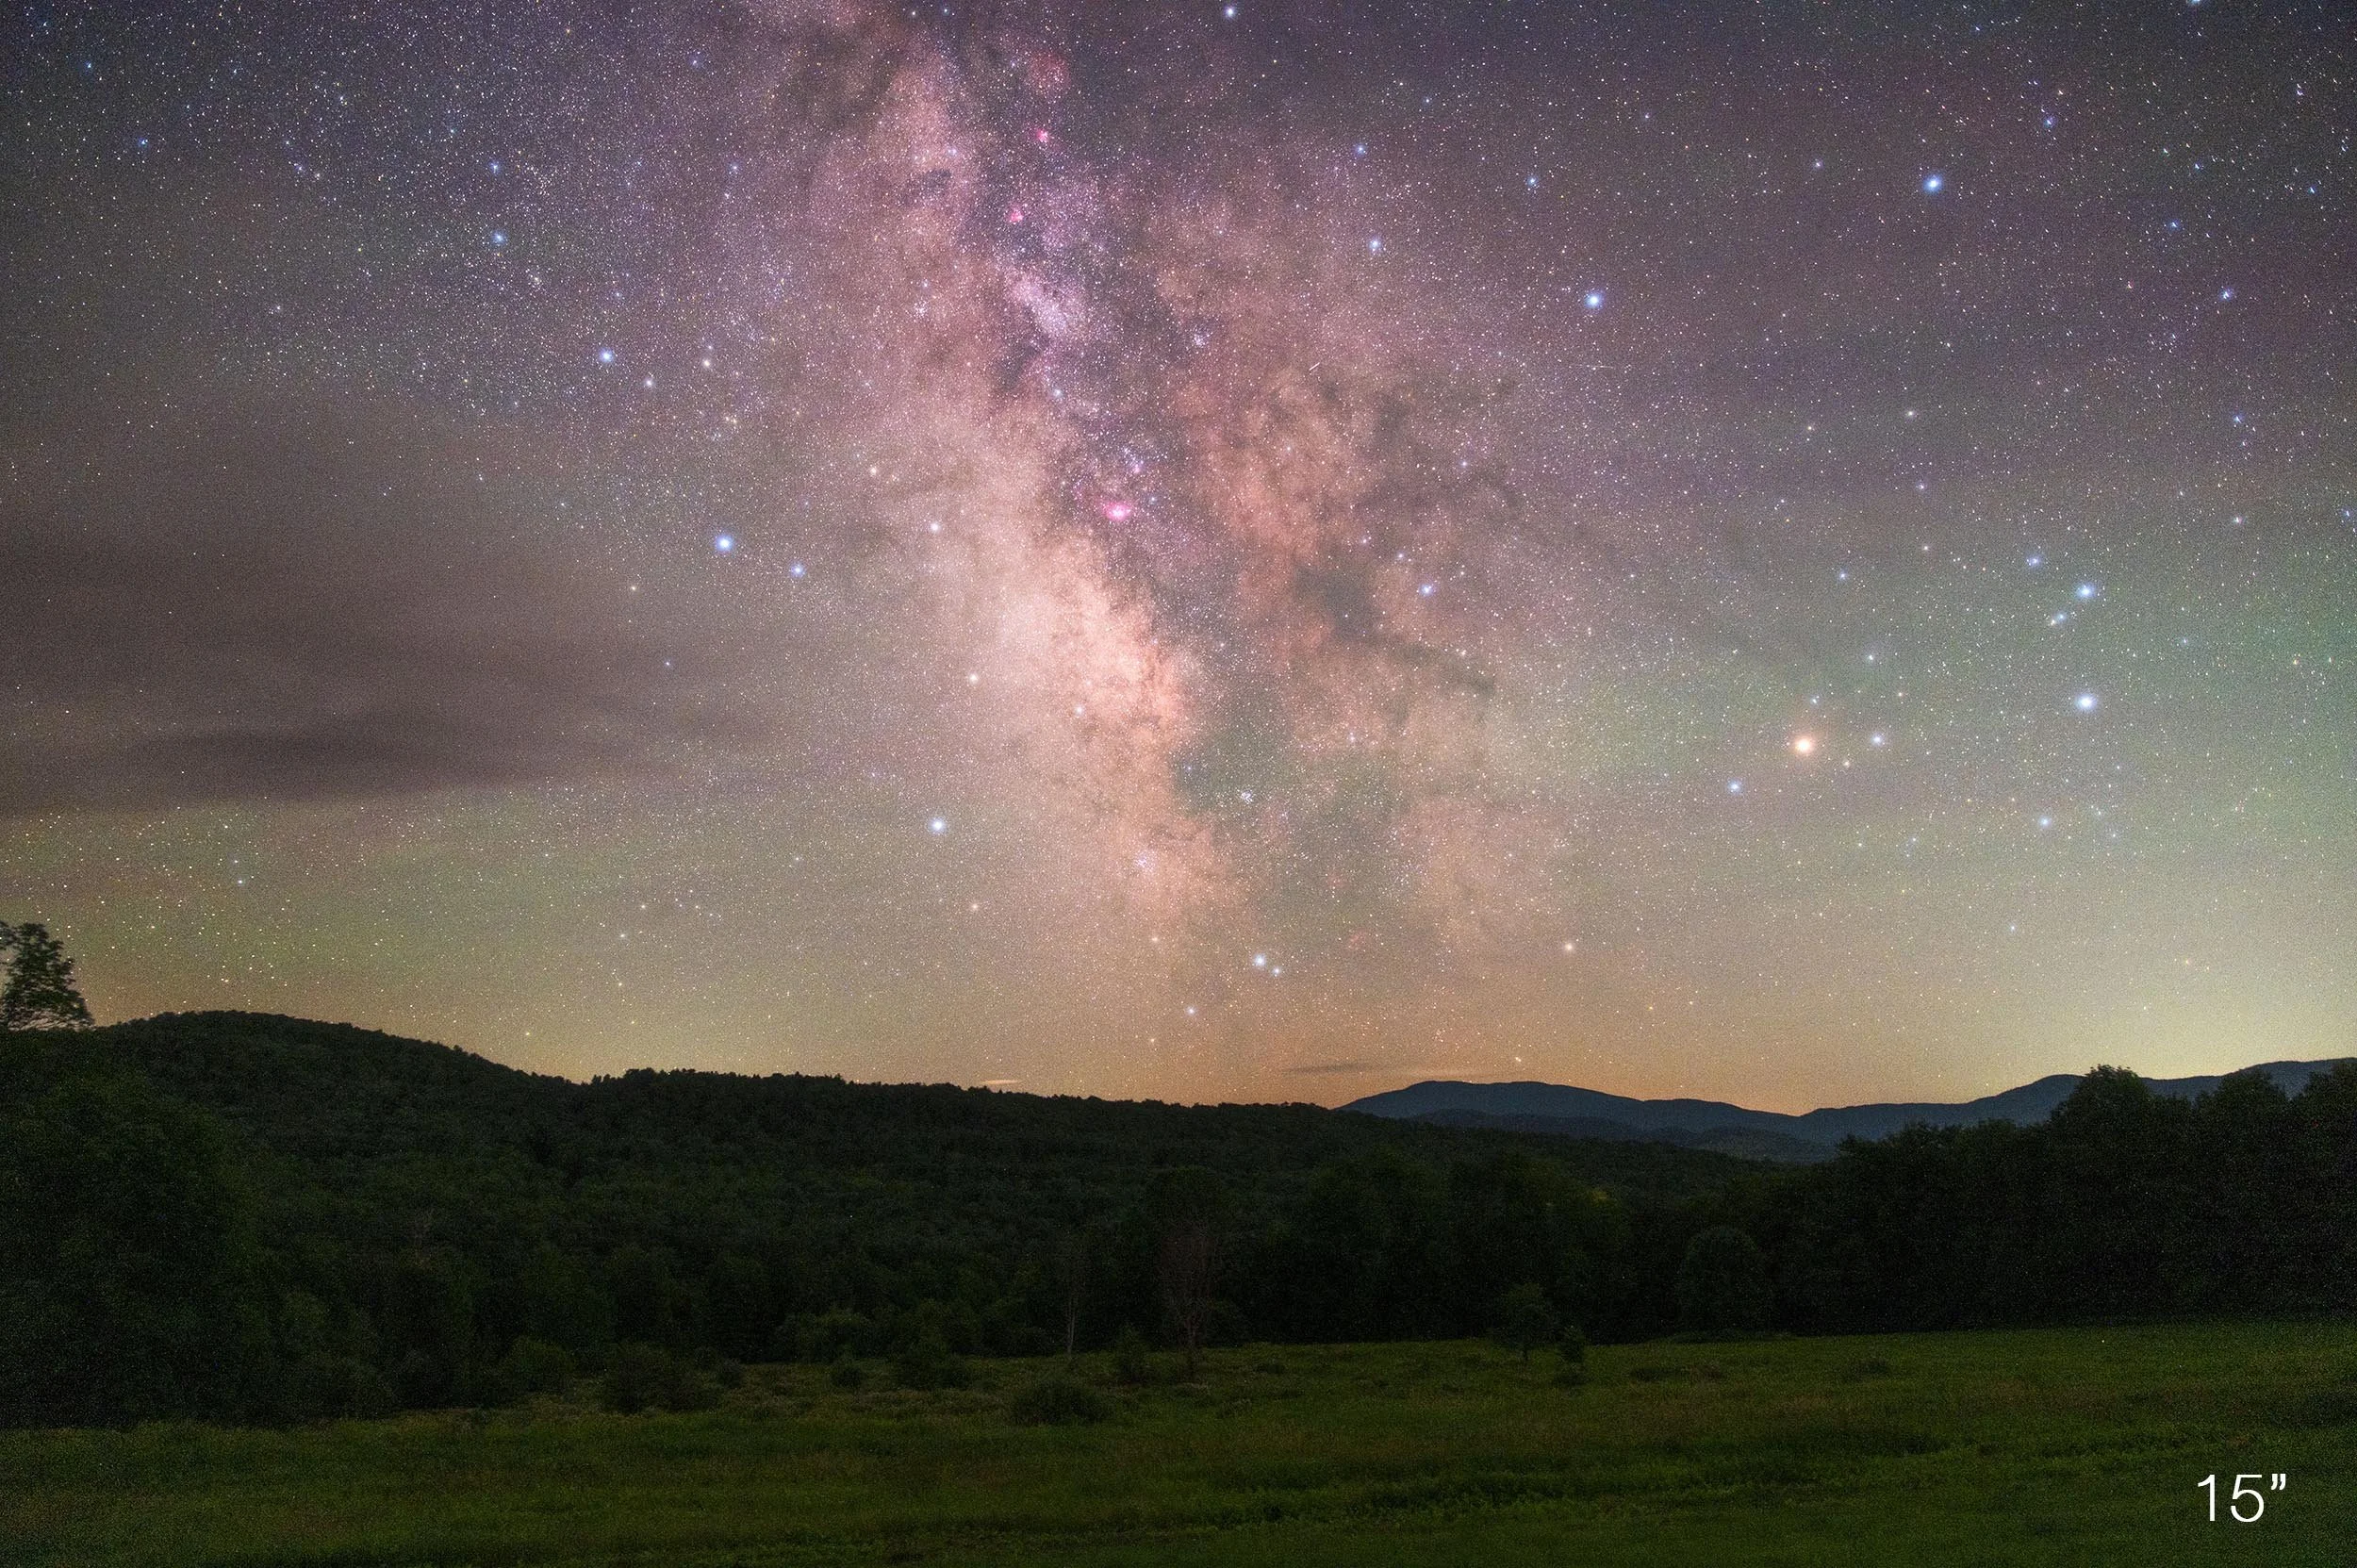
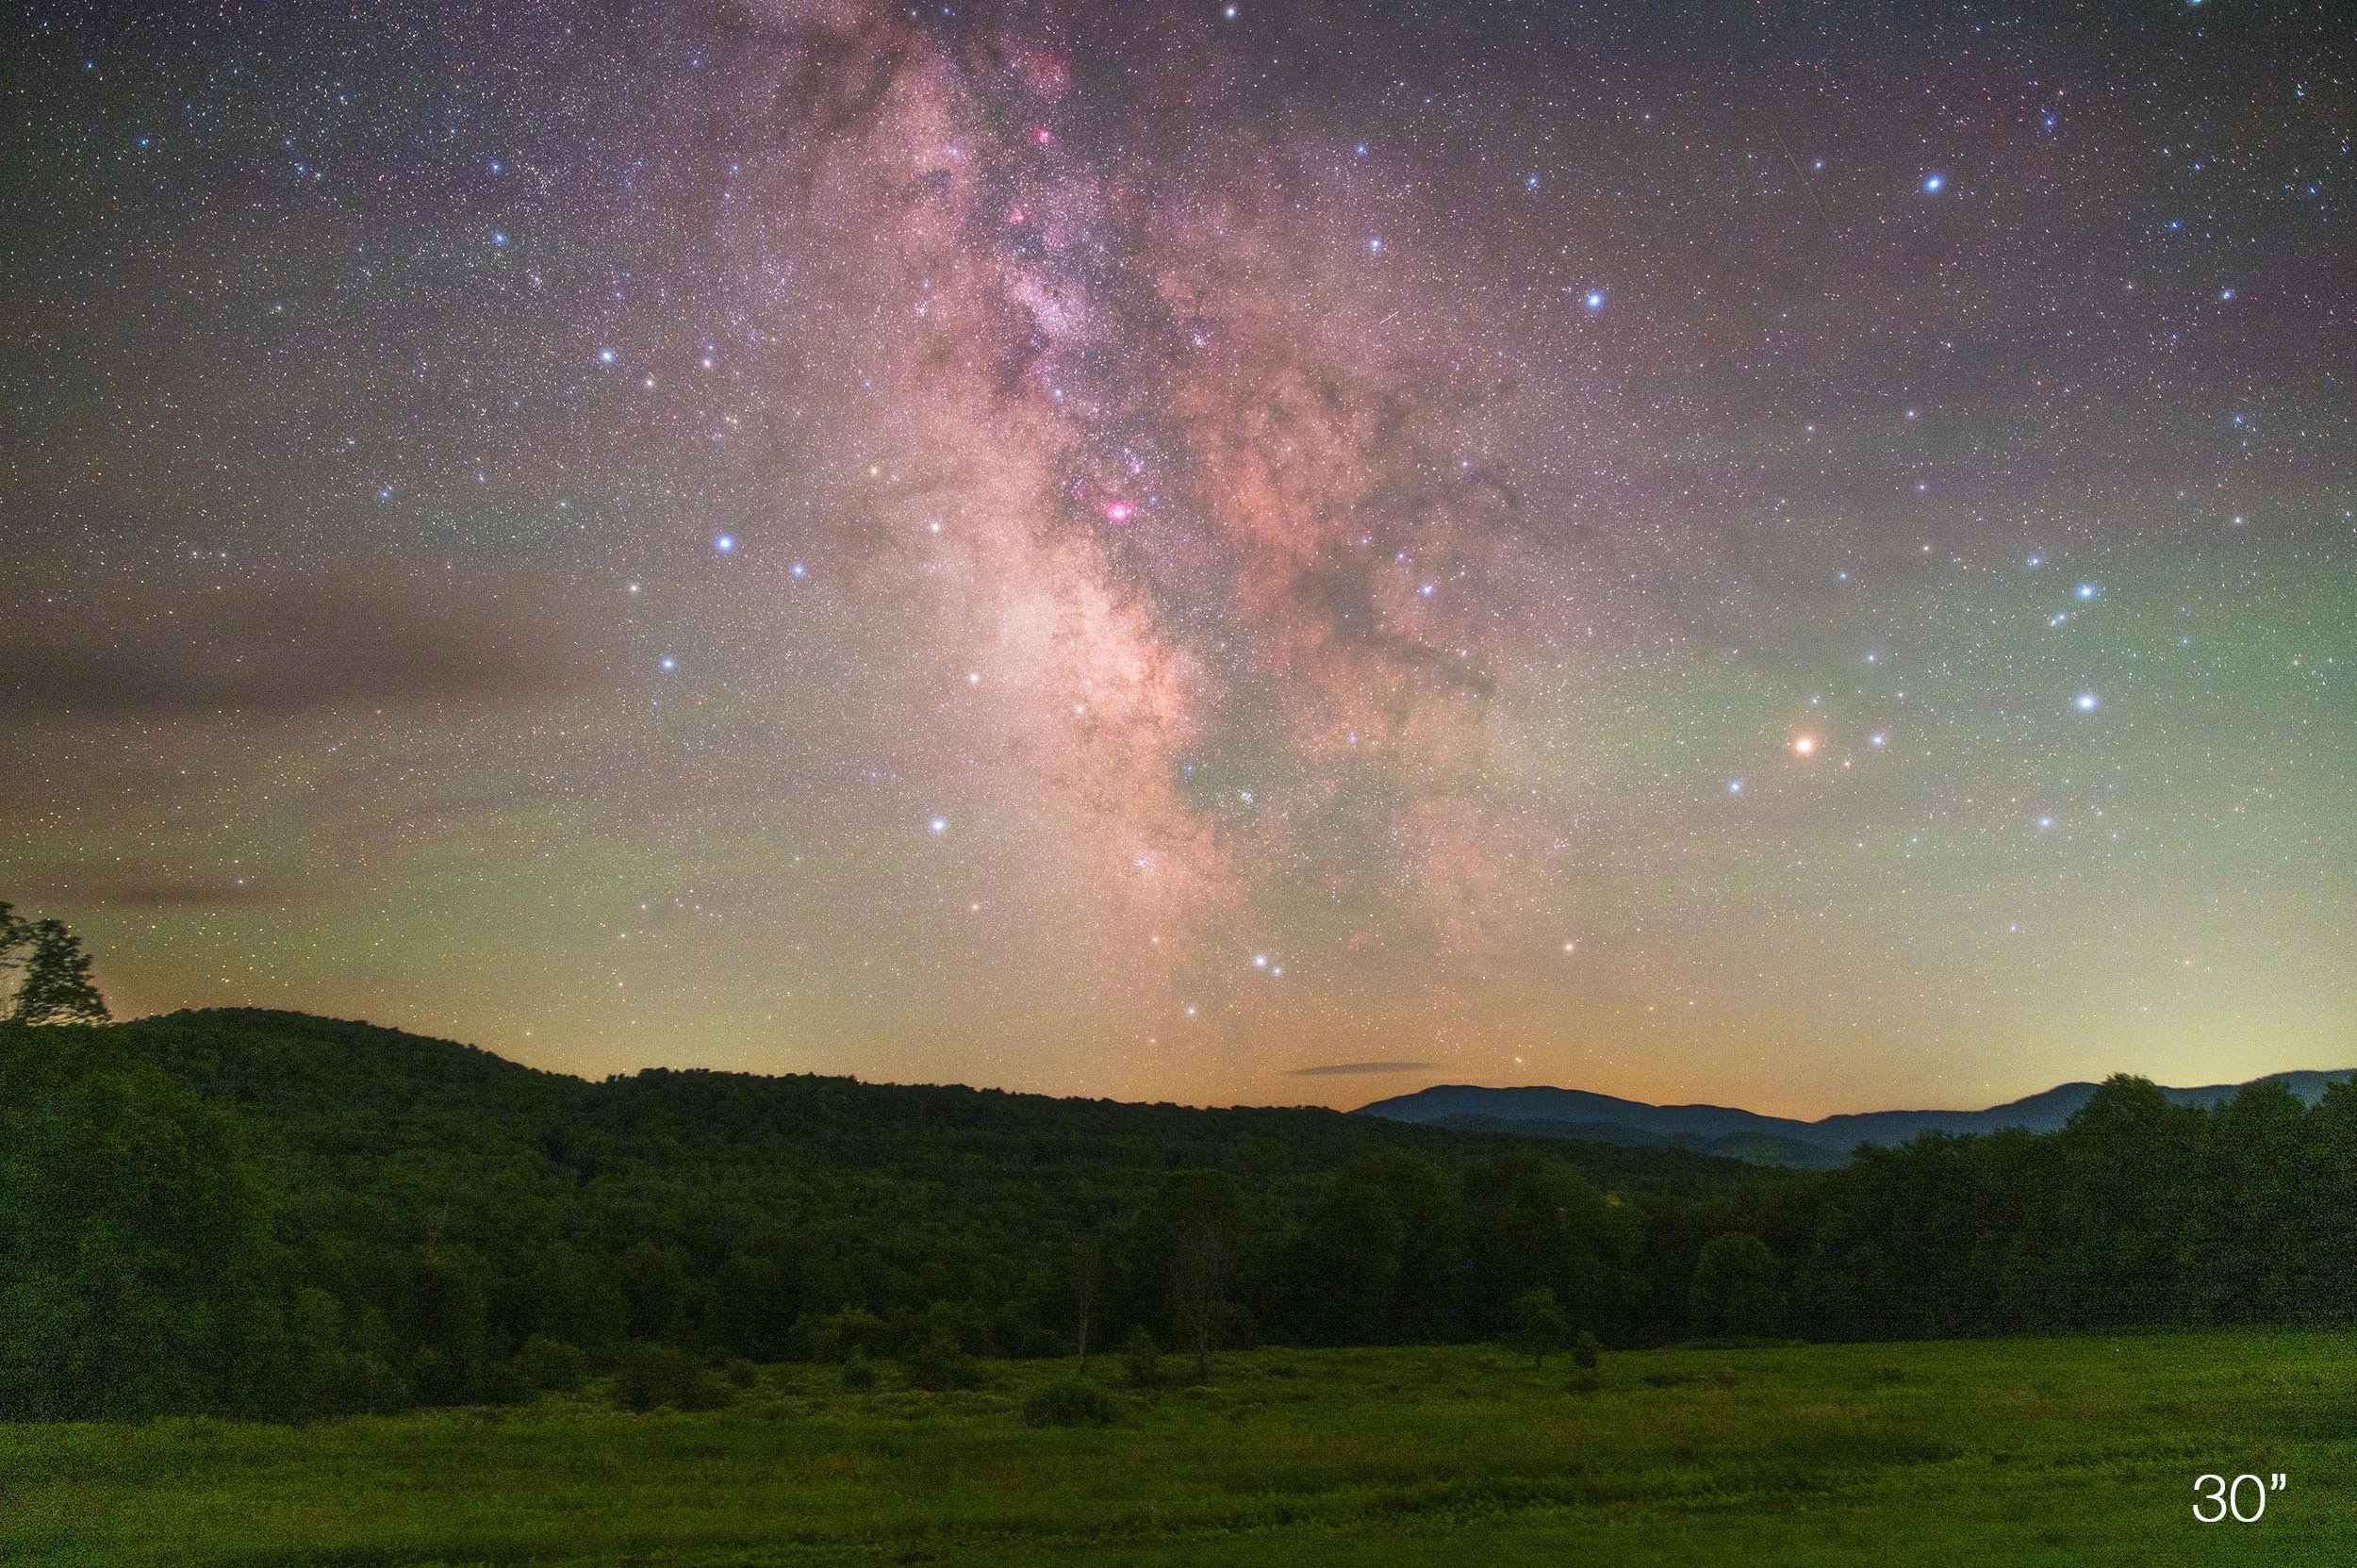
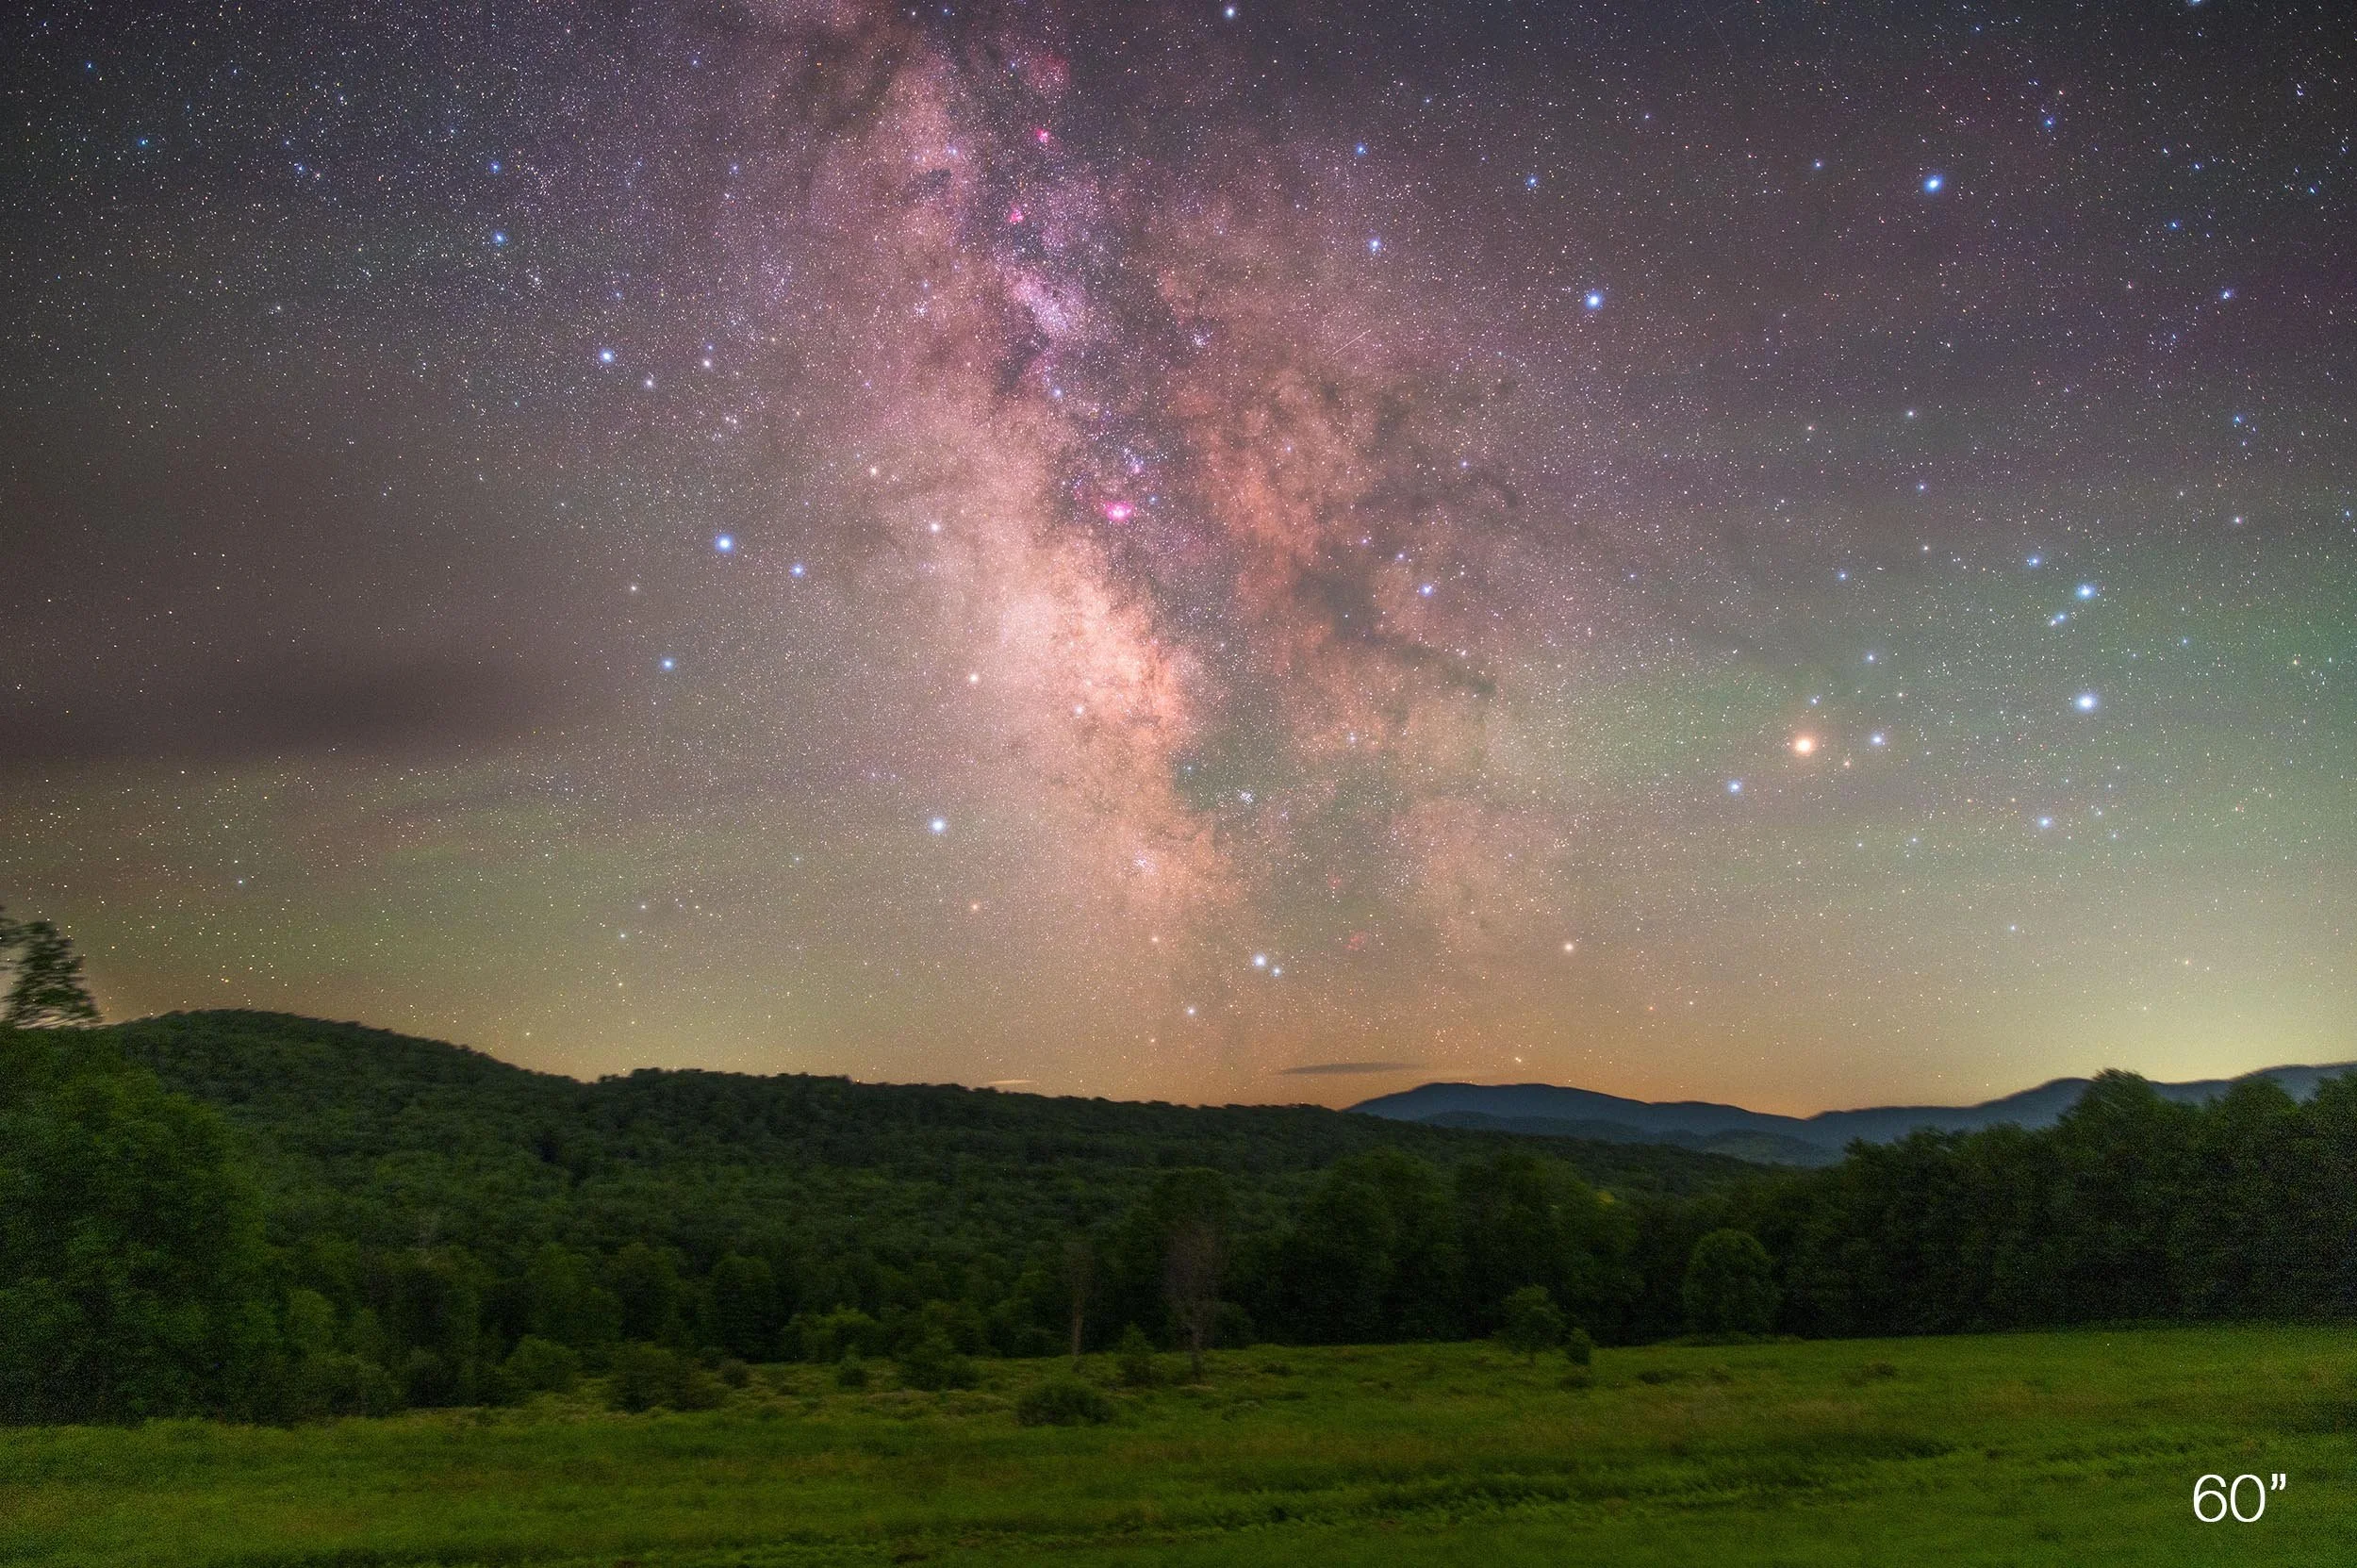
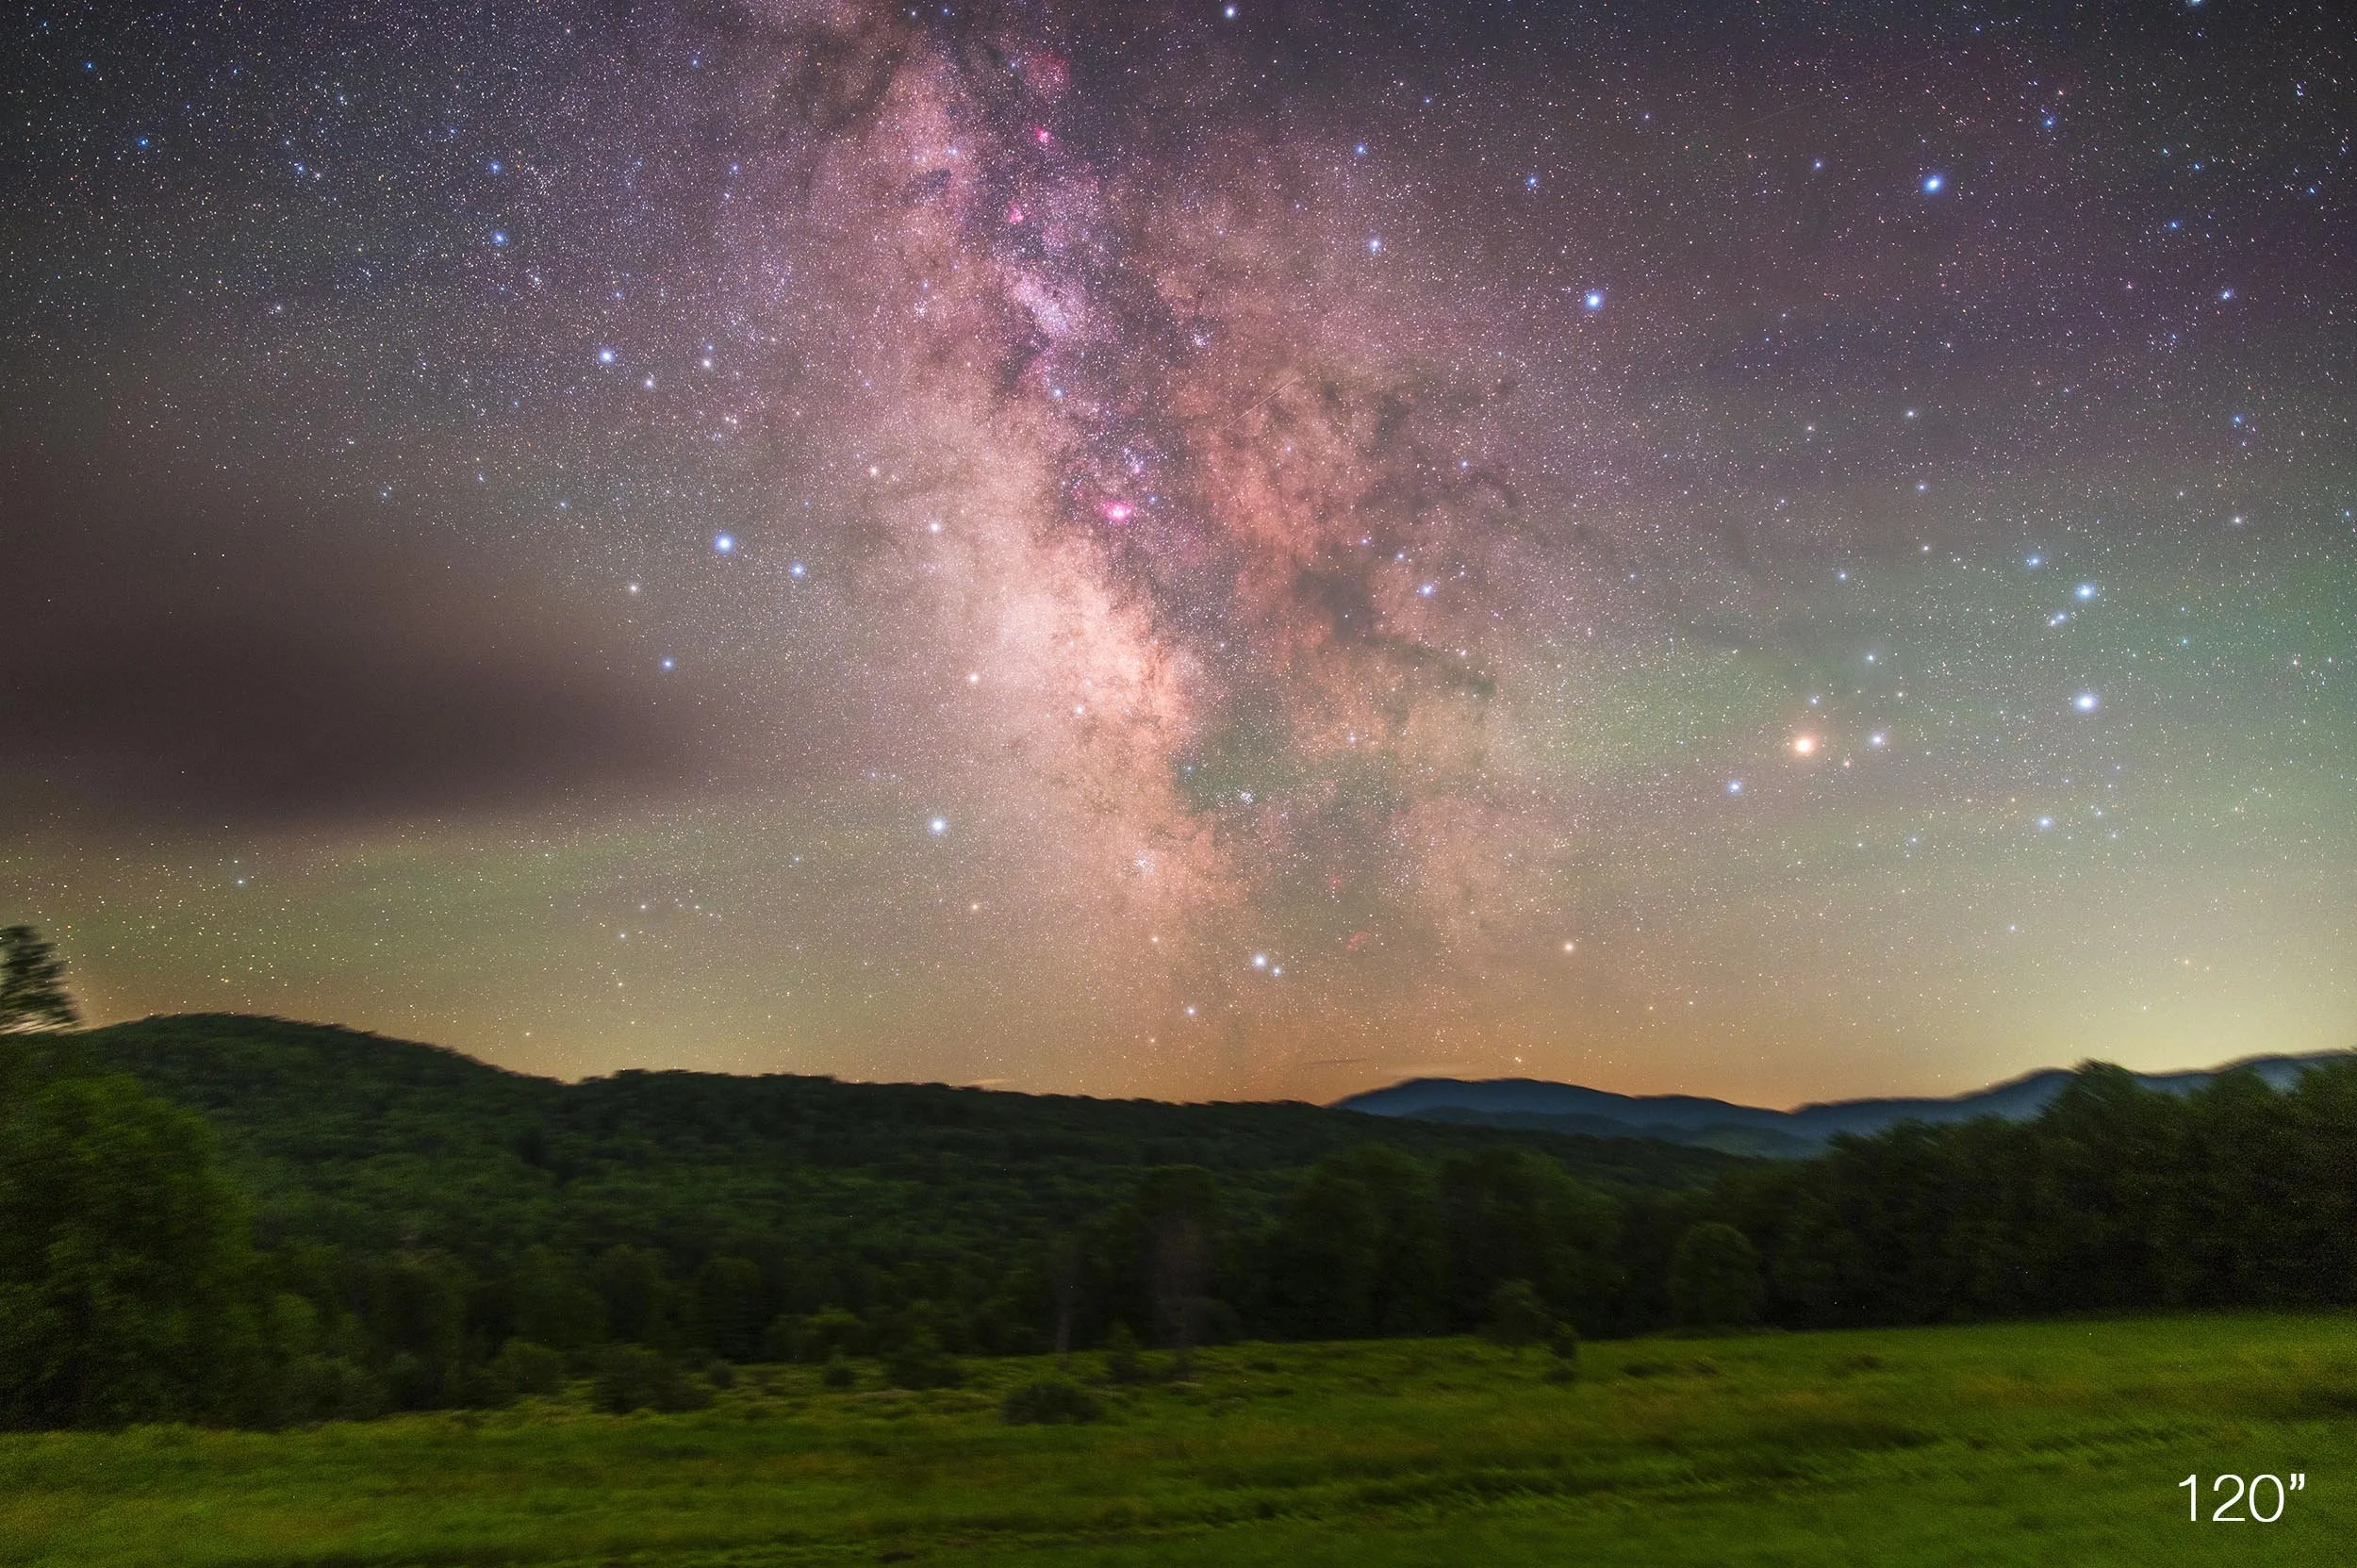
The only thing that changed was how long the shutter stayed open. 8 seconds, 15, 30, 60, 120.
Notice that I did not touch ISO. ISO is what the internet loves to blame for noise, which is like blaming the canary in the coal mine.
Think of capturing light’s photons like raindrops on a sidewalk, noise is the space where raindrops don’t hit a surface. So the more rain there is, the less noise we see. In the daytime that light is like a downpour, but at night it’s an inconsistent drizzle at best.
And of course, nothing was done differently in editing.
Neutralize the White Balance
Adjust Exposure slider to match luminance values
Shadows increased to the tolerance of the file
Contrast added to the sky using a mask and curves.
Here’s a side by side of the 8” and 120” image overlaid on each other to show the difference.
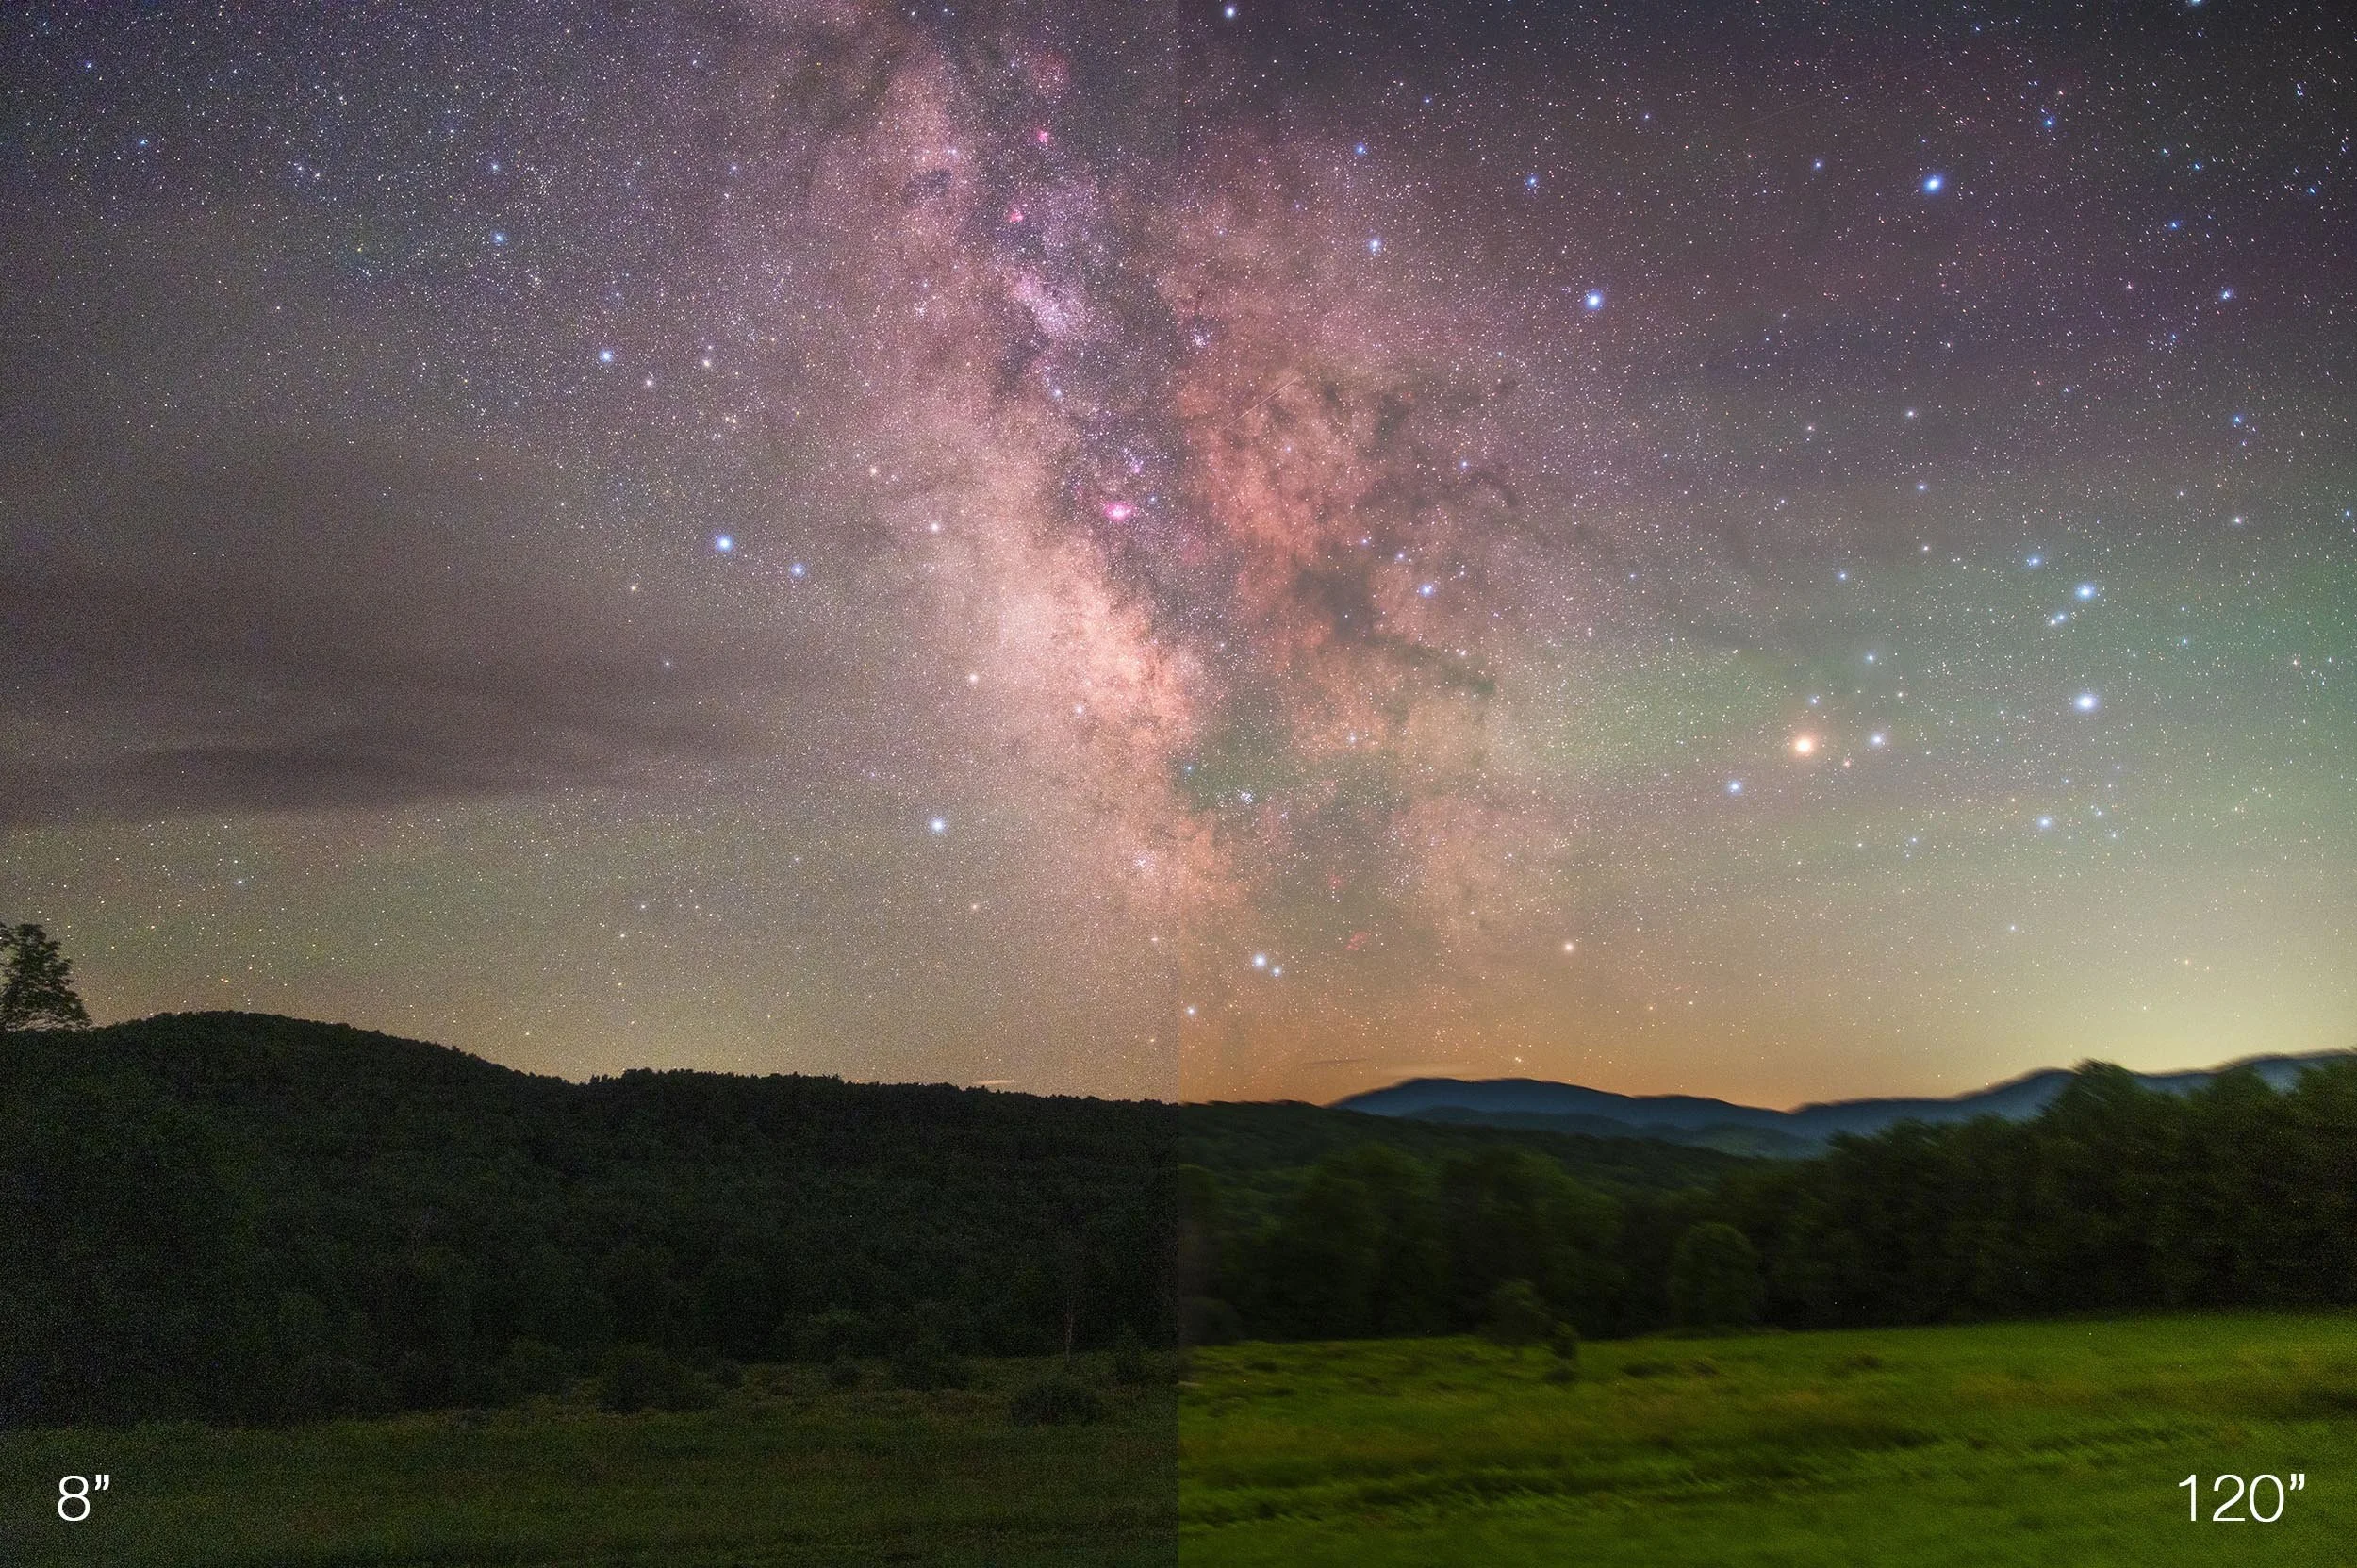
But still, these don’t tell the whole story. We need to zoom in.
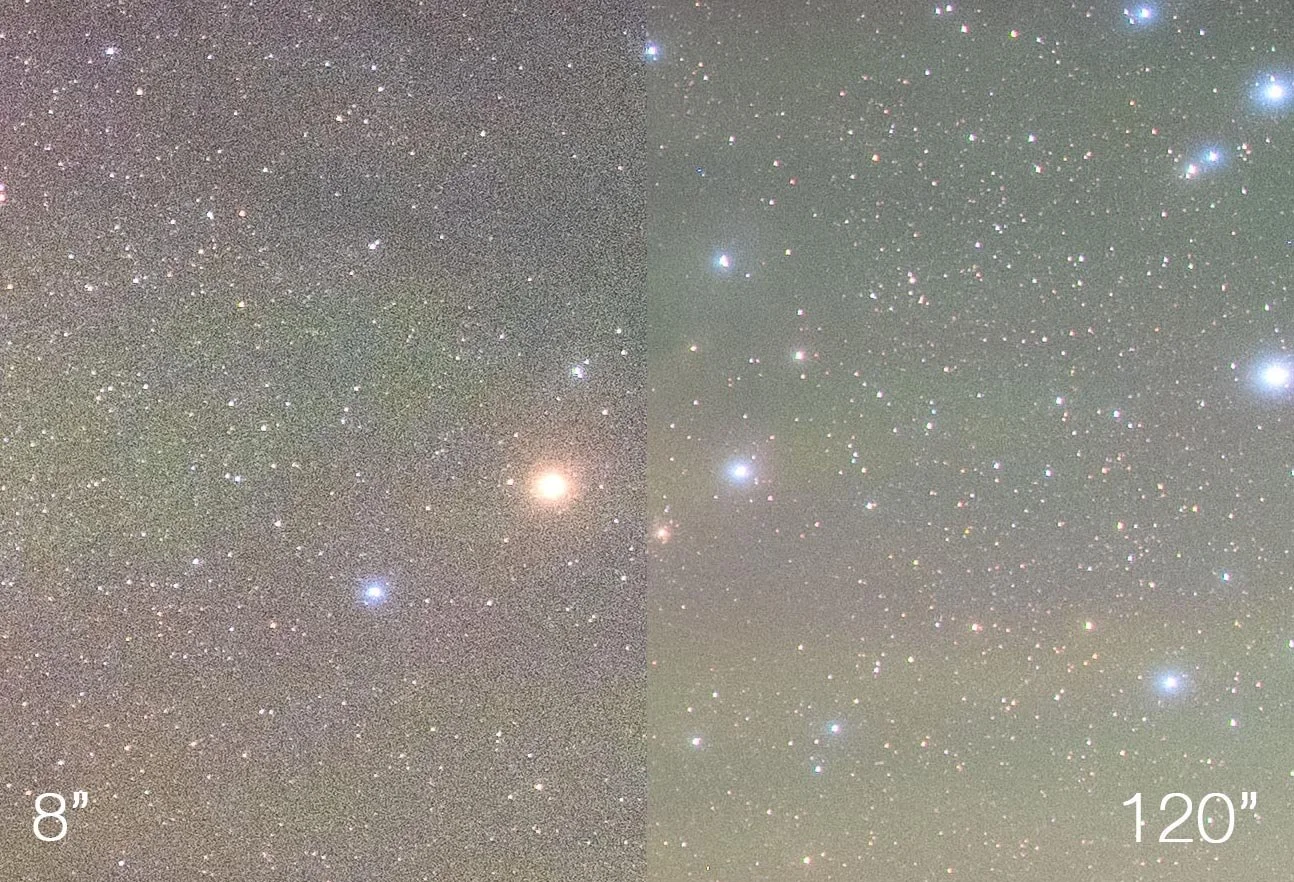
Here is the core at 100%:
(Click to see them large)
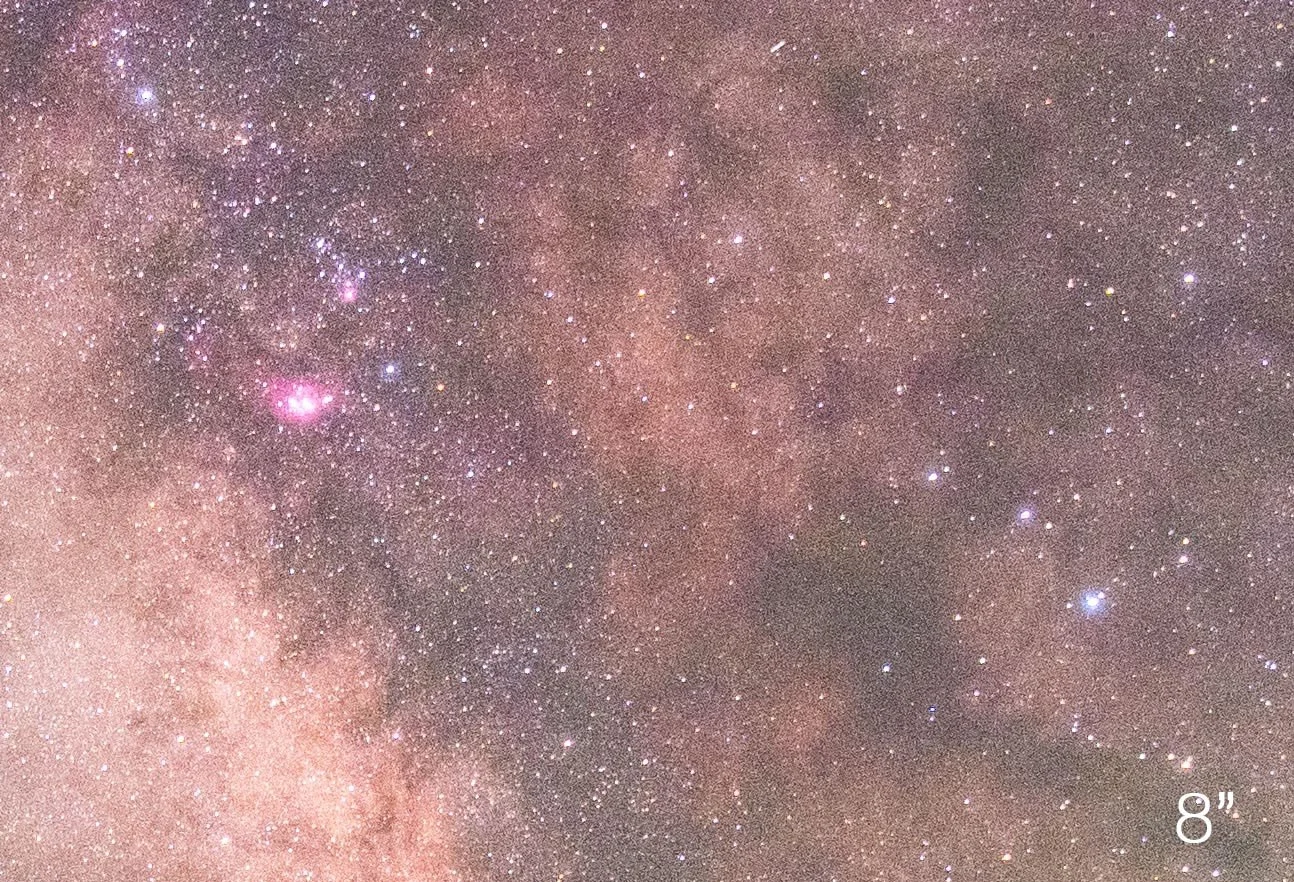
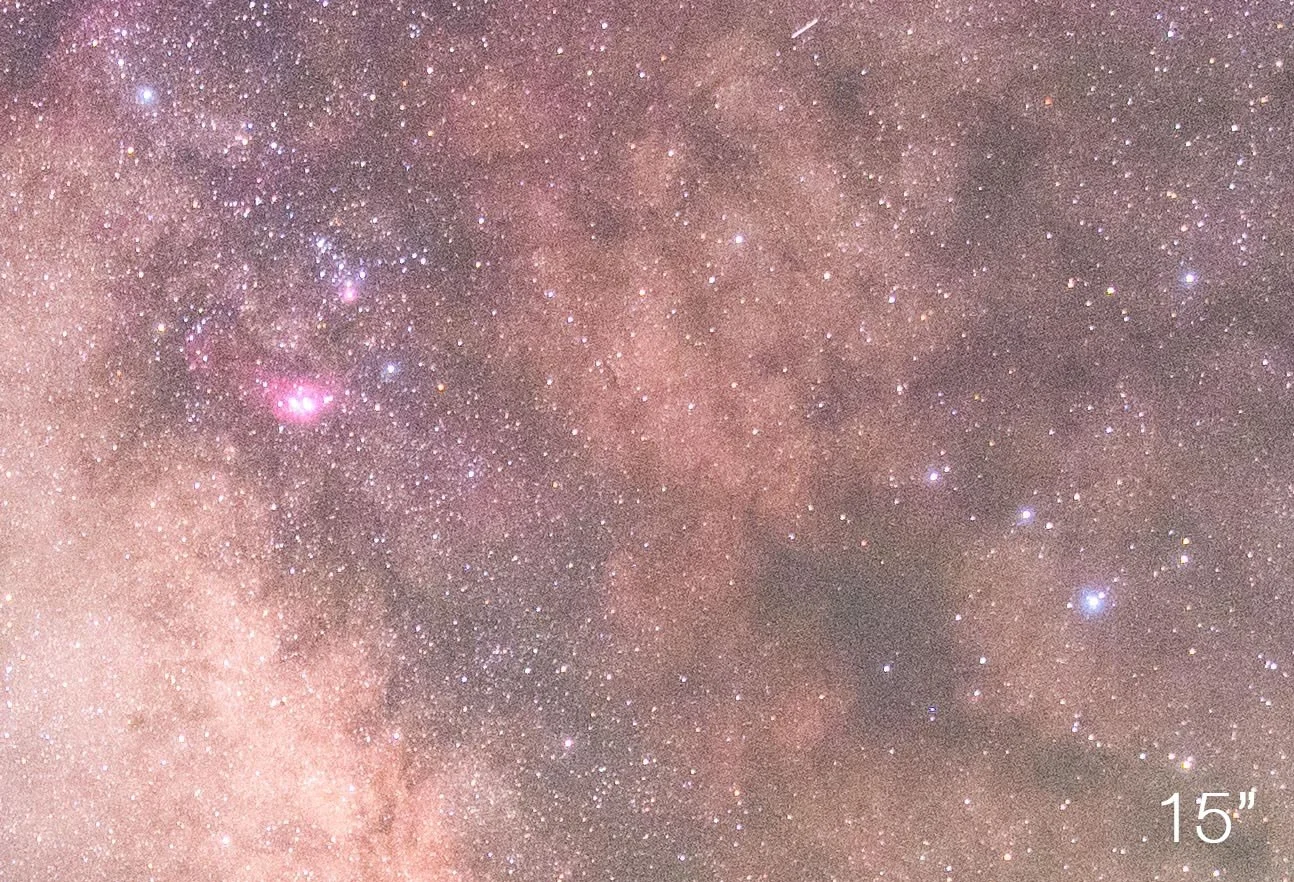
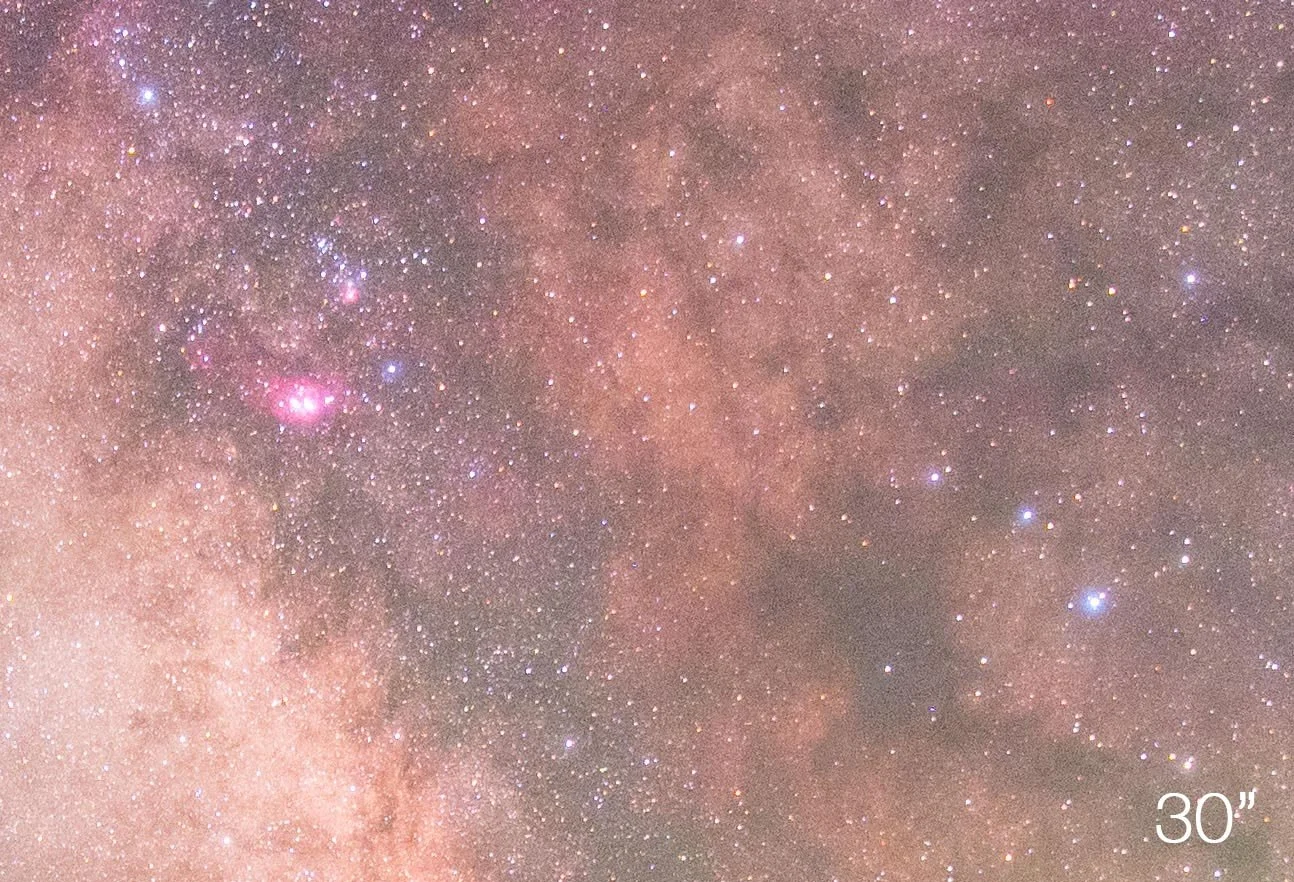
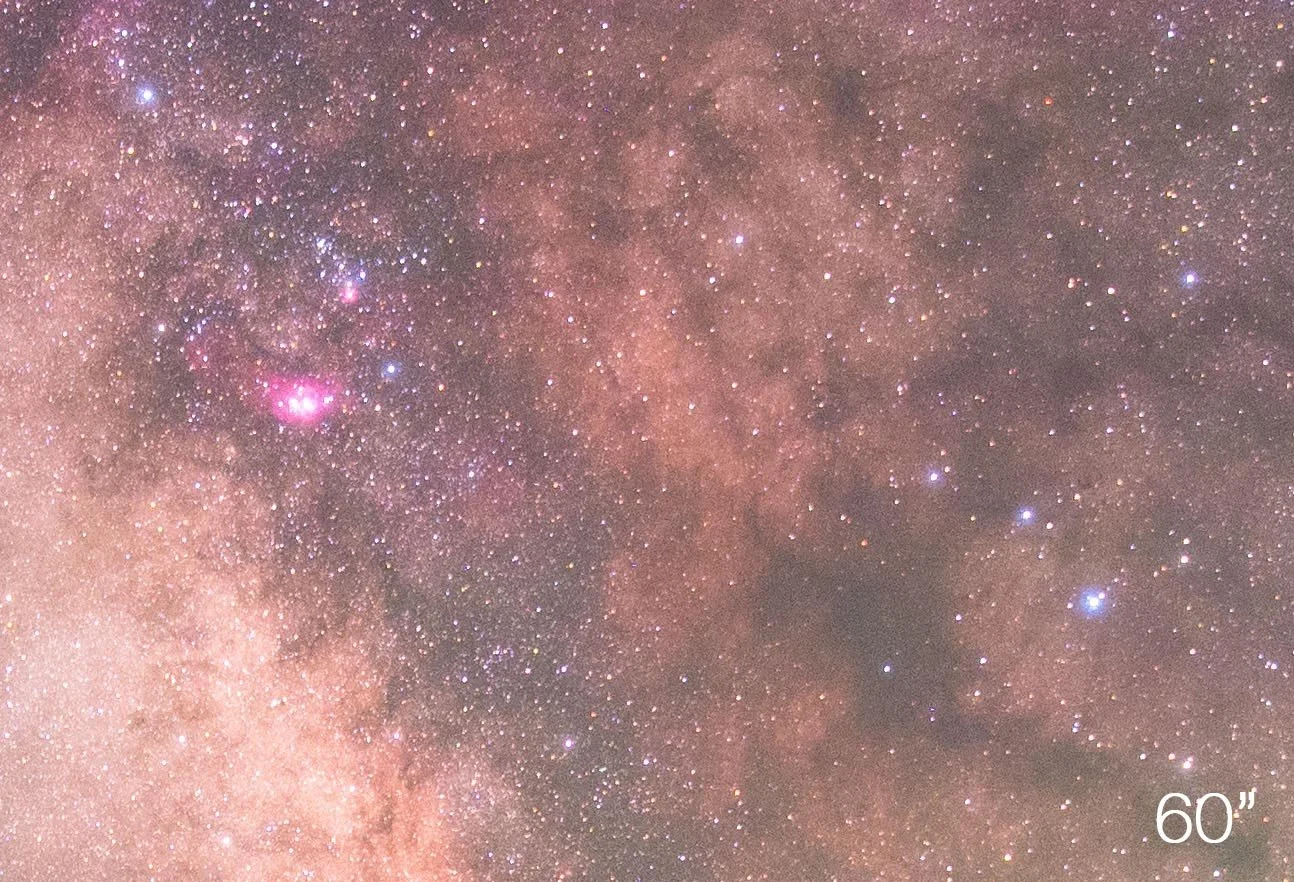
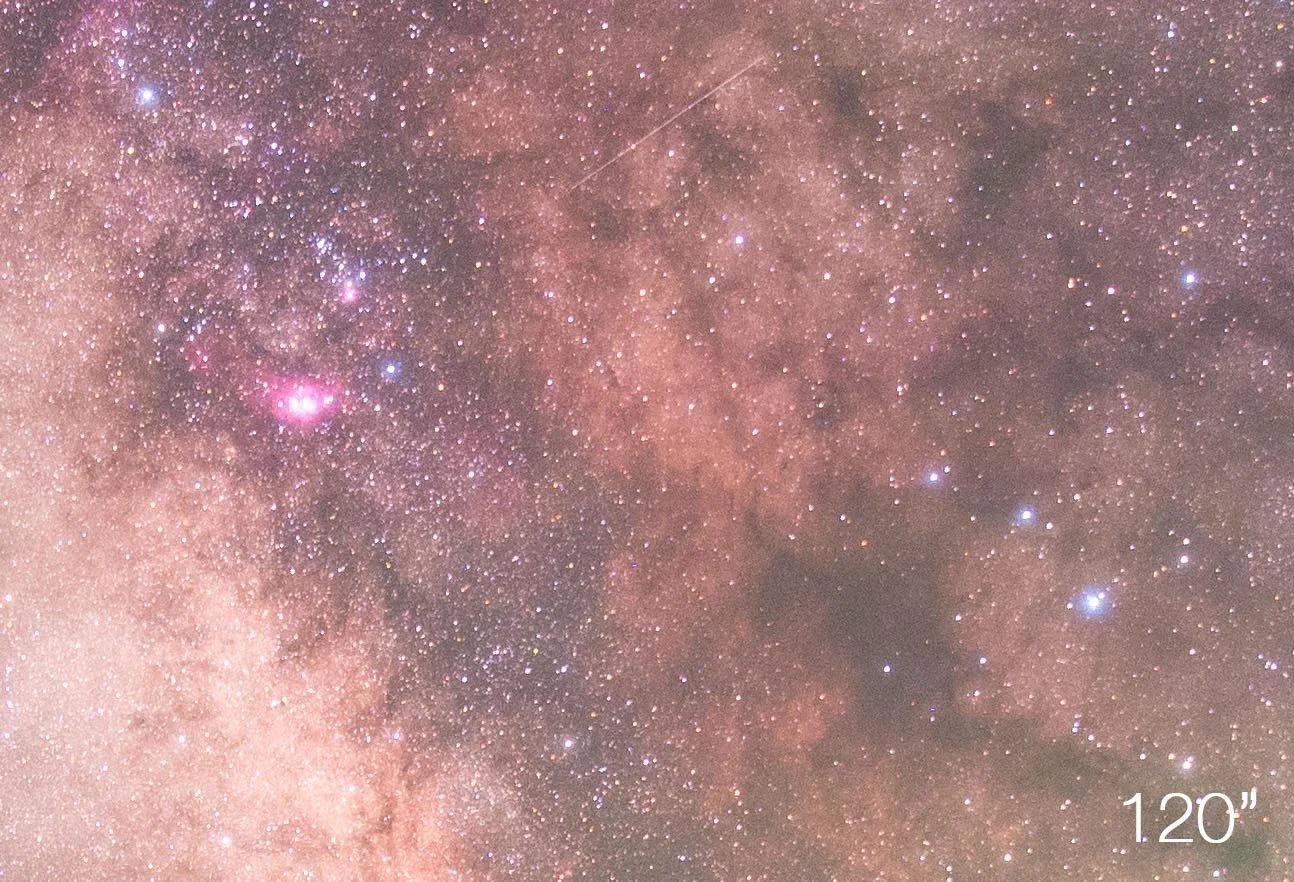
The 8 second frame is grainy and thin. The dust lanes are mush.
By 30 seconds the noise falls away and structure appears.
By 120 the dark nebulae have edges.
And then there is the colour.
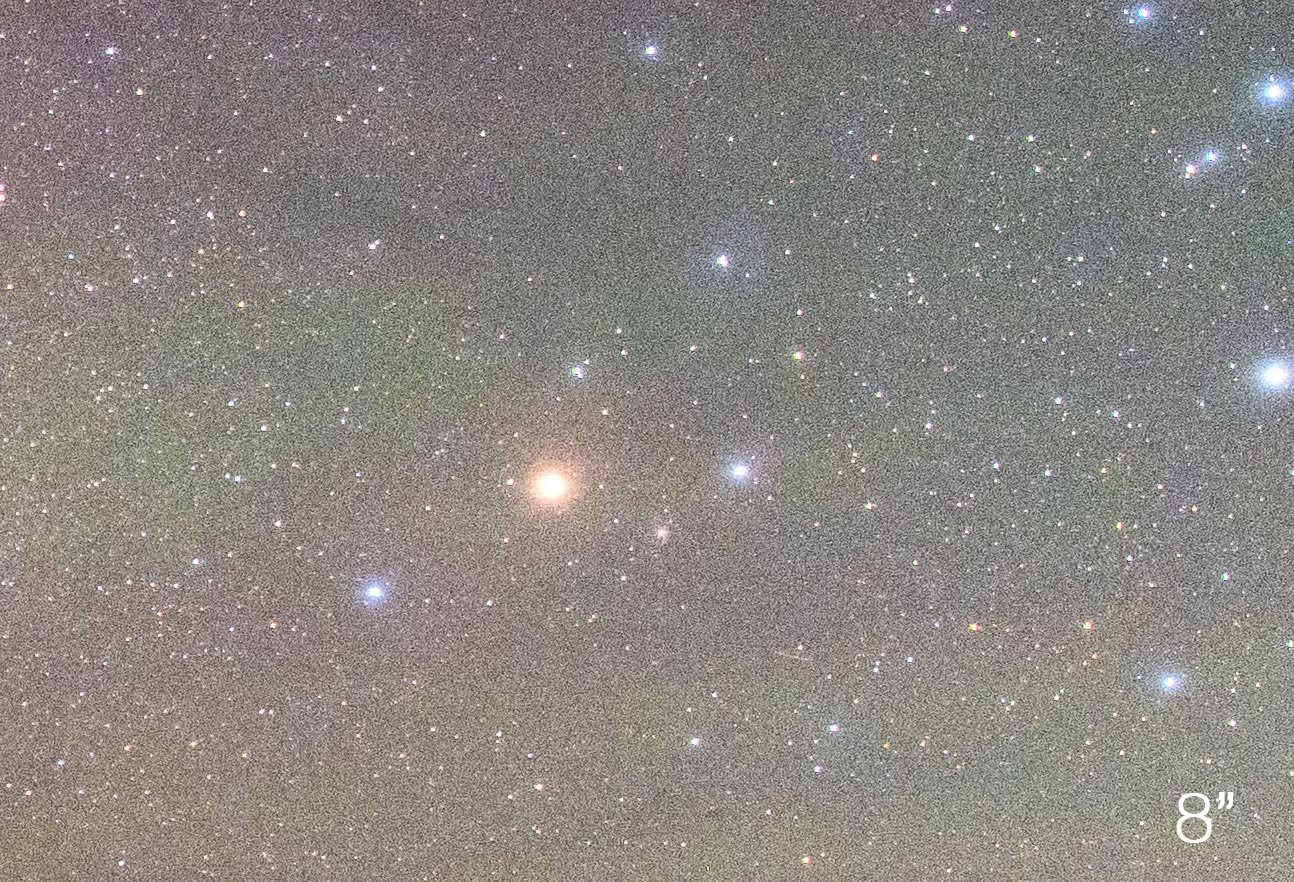
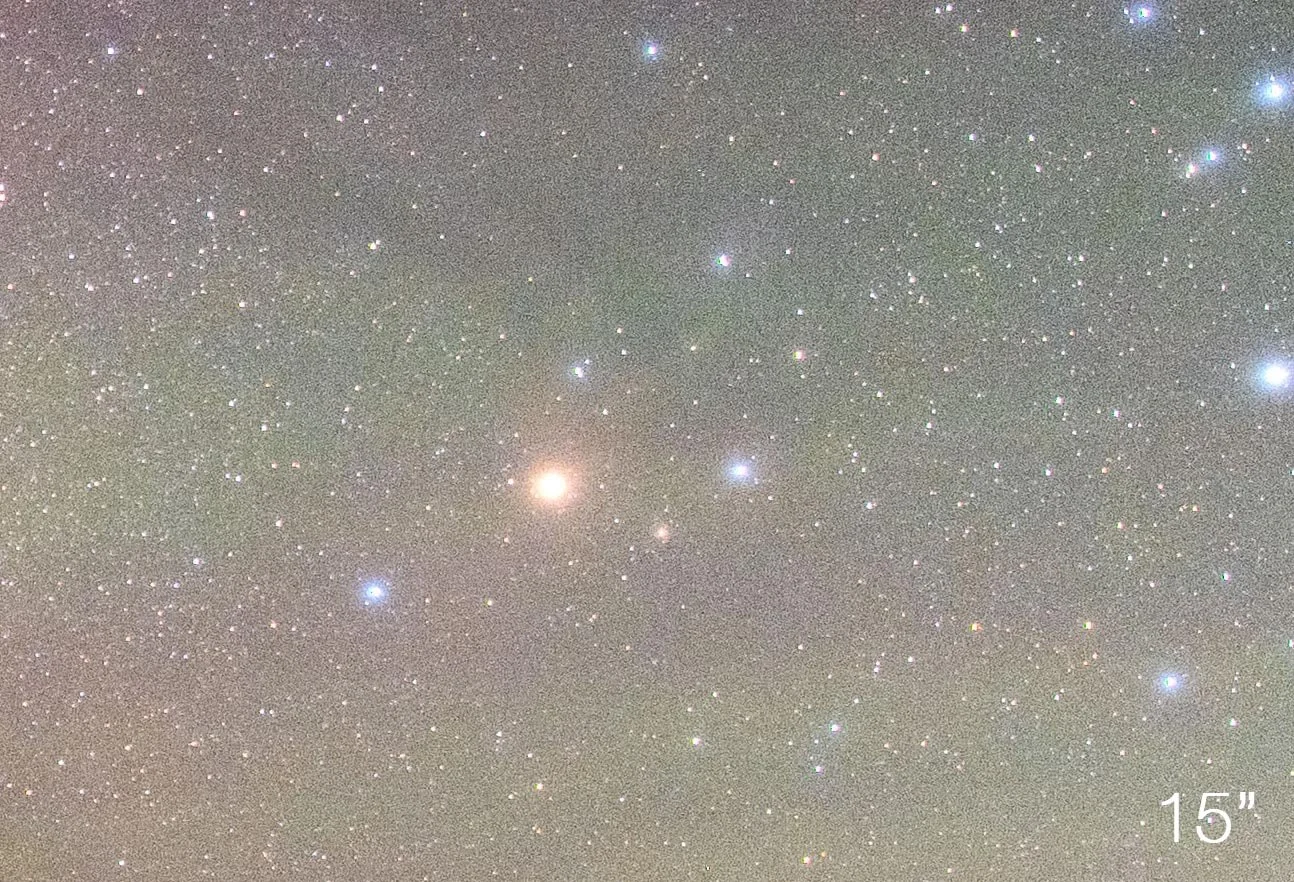
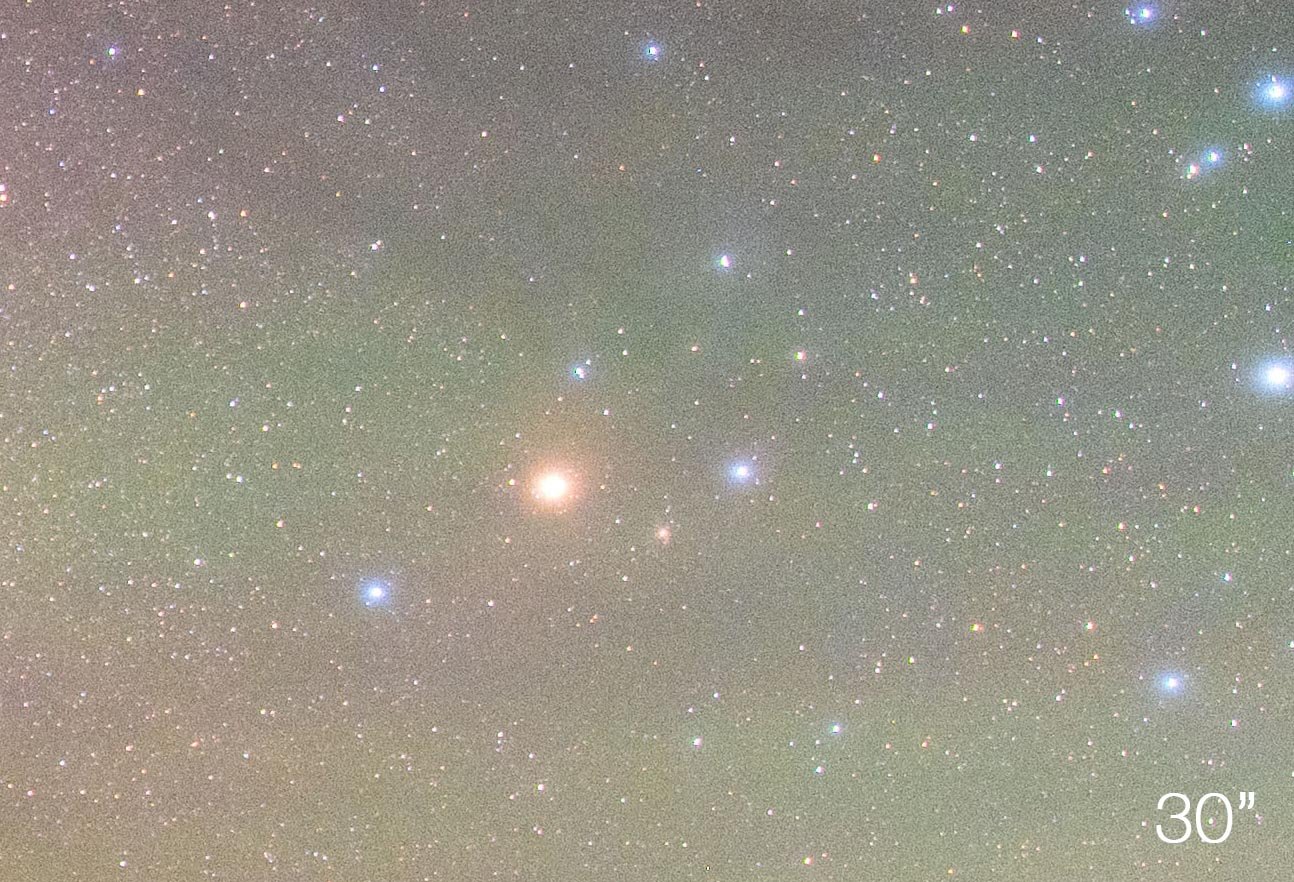
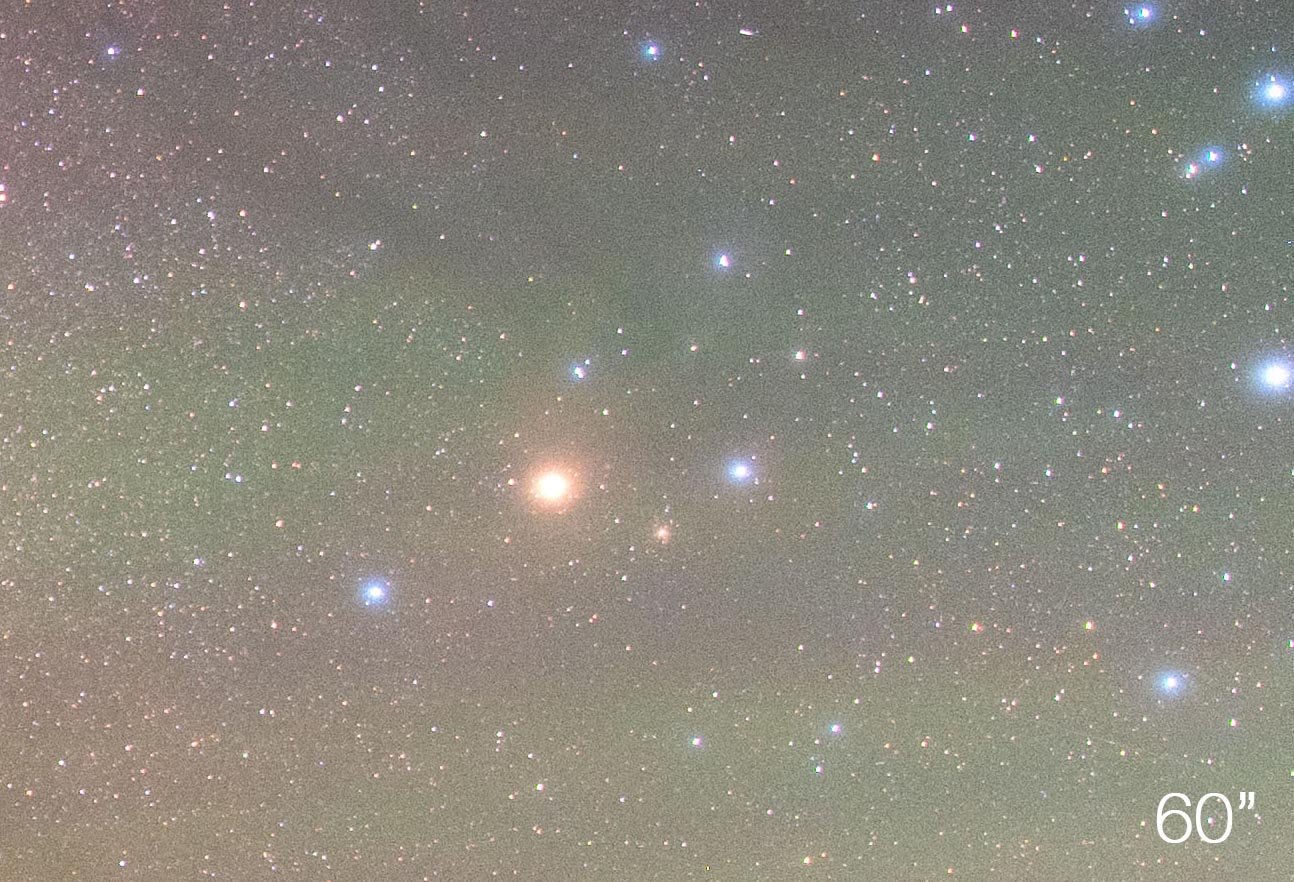
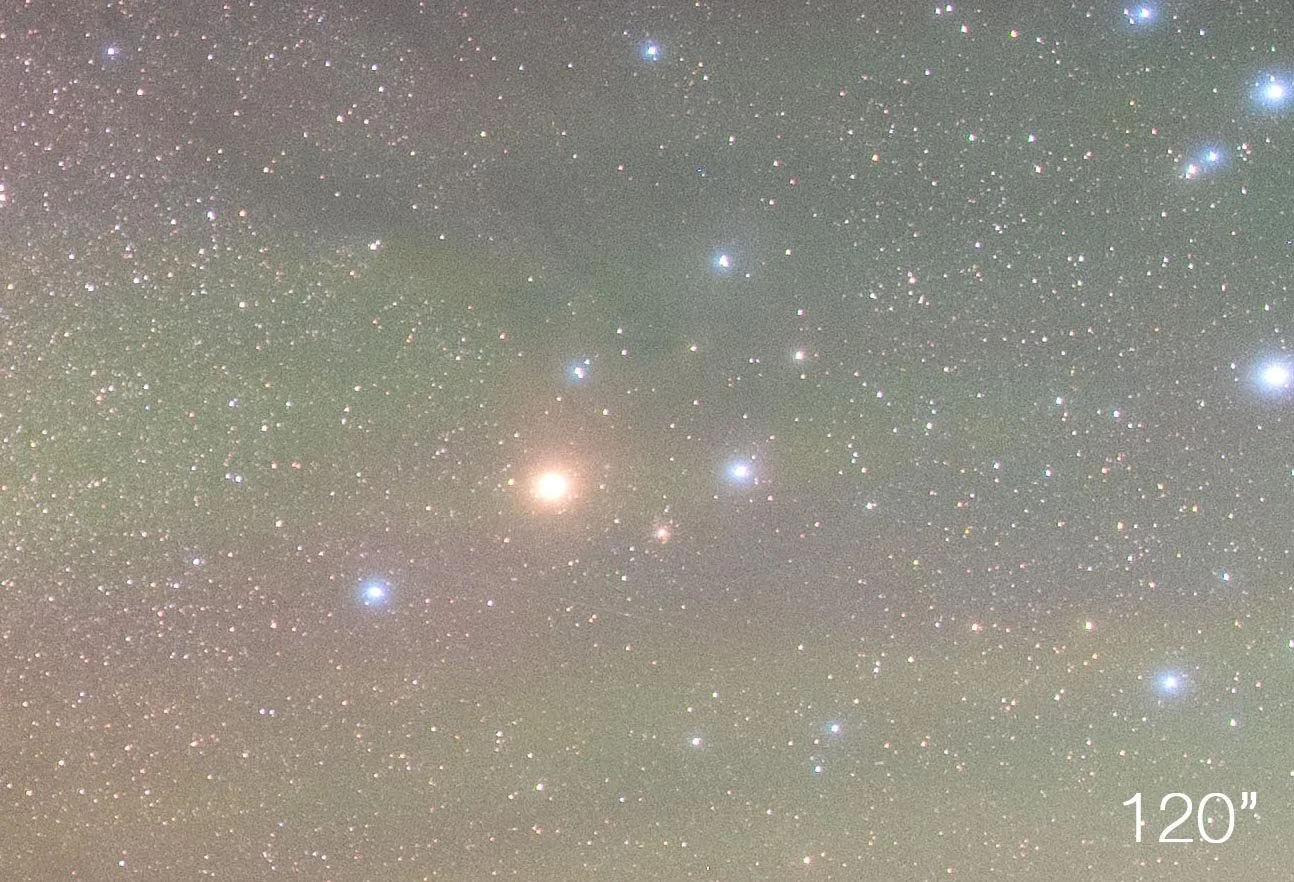
At 8 seconds, Rho is a pale wash. At 120, Antares glows warm, the blue reflection nebula separates out, and the region finally looks like the thing it actually is.
That is not a just a technical improvement. It’s is an emotional one.
What is actually happening?
Your sensor collects raindrops (aka photons aka signal aka our subject) while the shutter is open. Noise sits in the background at a roughly constant level through the night.
The more time you let your sensor collect the raindrops, the less noise is going to be visible.
But longer shutter speeds don’t just reduce noise reduction (we can get that through stacking)
Detail, colour, and depth are not added later through processing.
They were either collected or they were not but how much signal was captured.
A better camera collects signal slightly more efficiently. Time collects it multiplicatively. That is why a long exposure on a ten year old APS-C camera beats a short one on the newest full frame you can buy.
I go properly deep on this in Episode 39 of the After Dark Photography Podcast.
Worth your headphones and a walk.
⬆️ That’s where I bring aperture and lenses into the convo too.
About the tracker
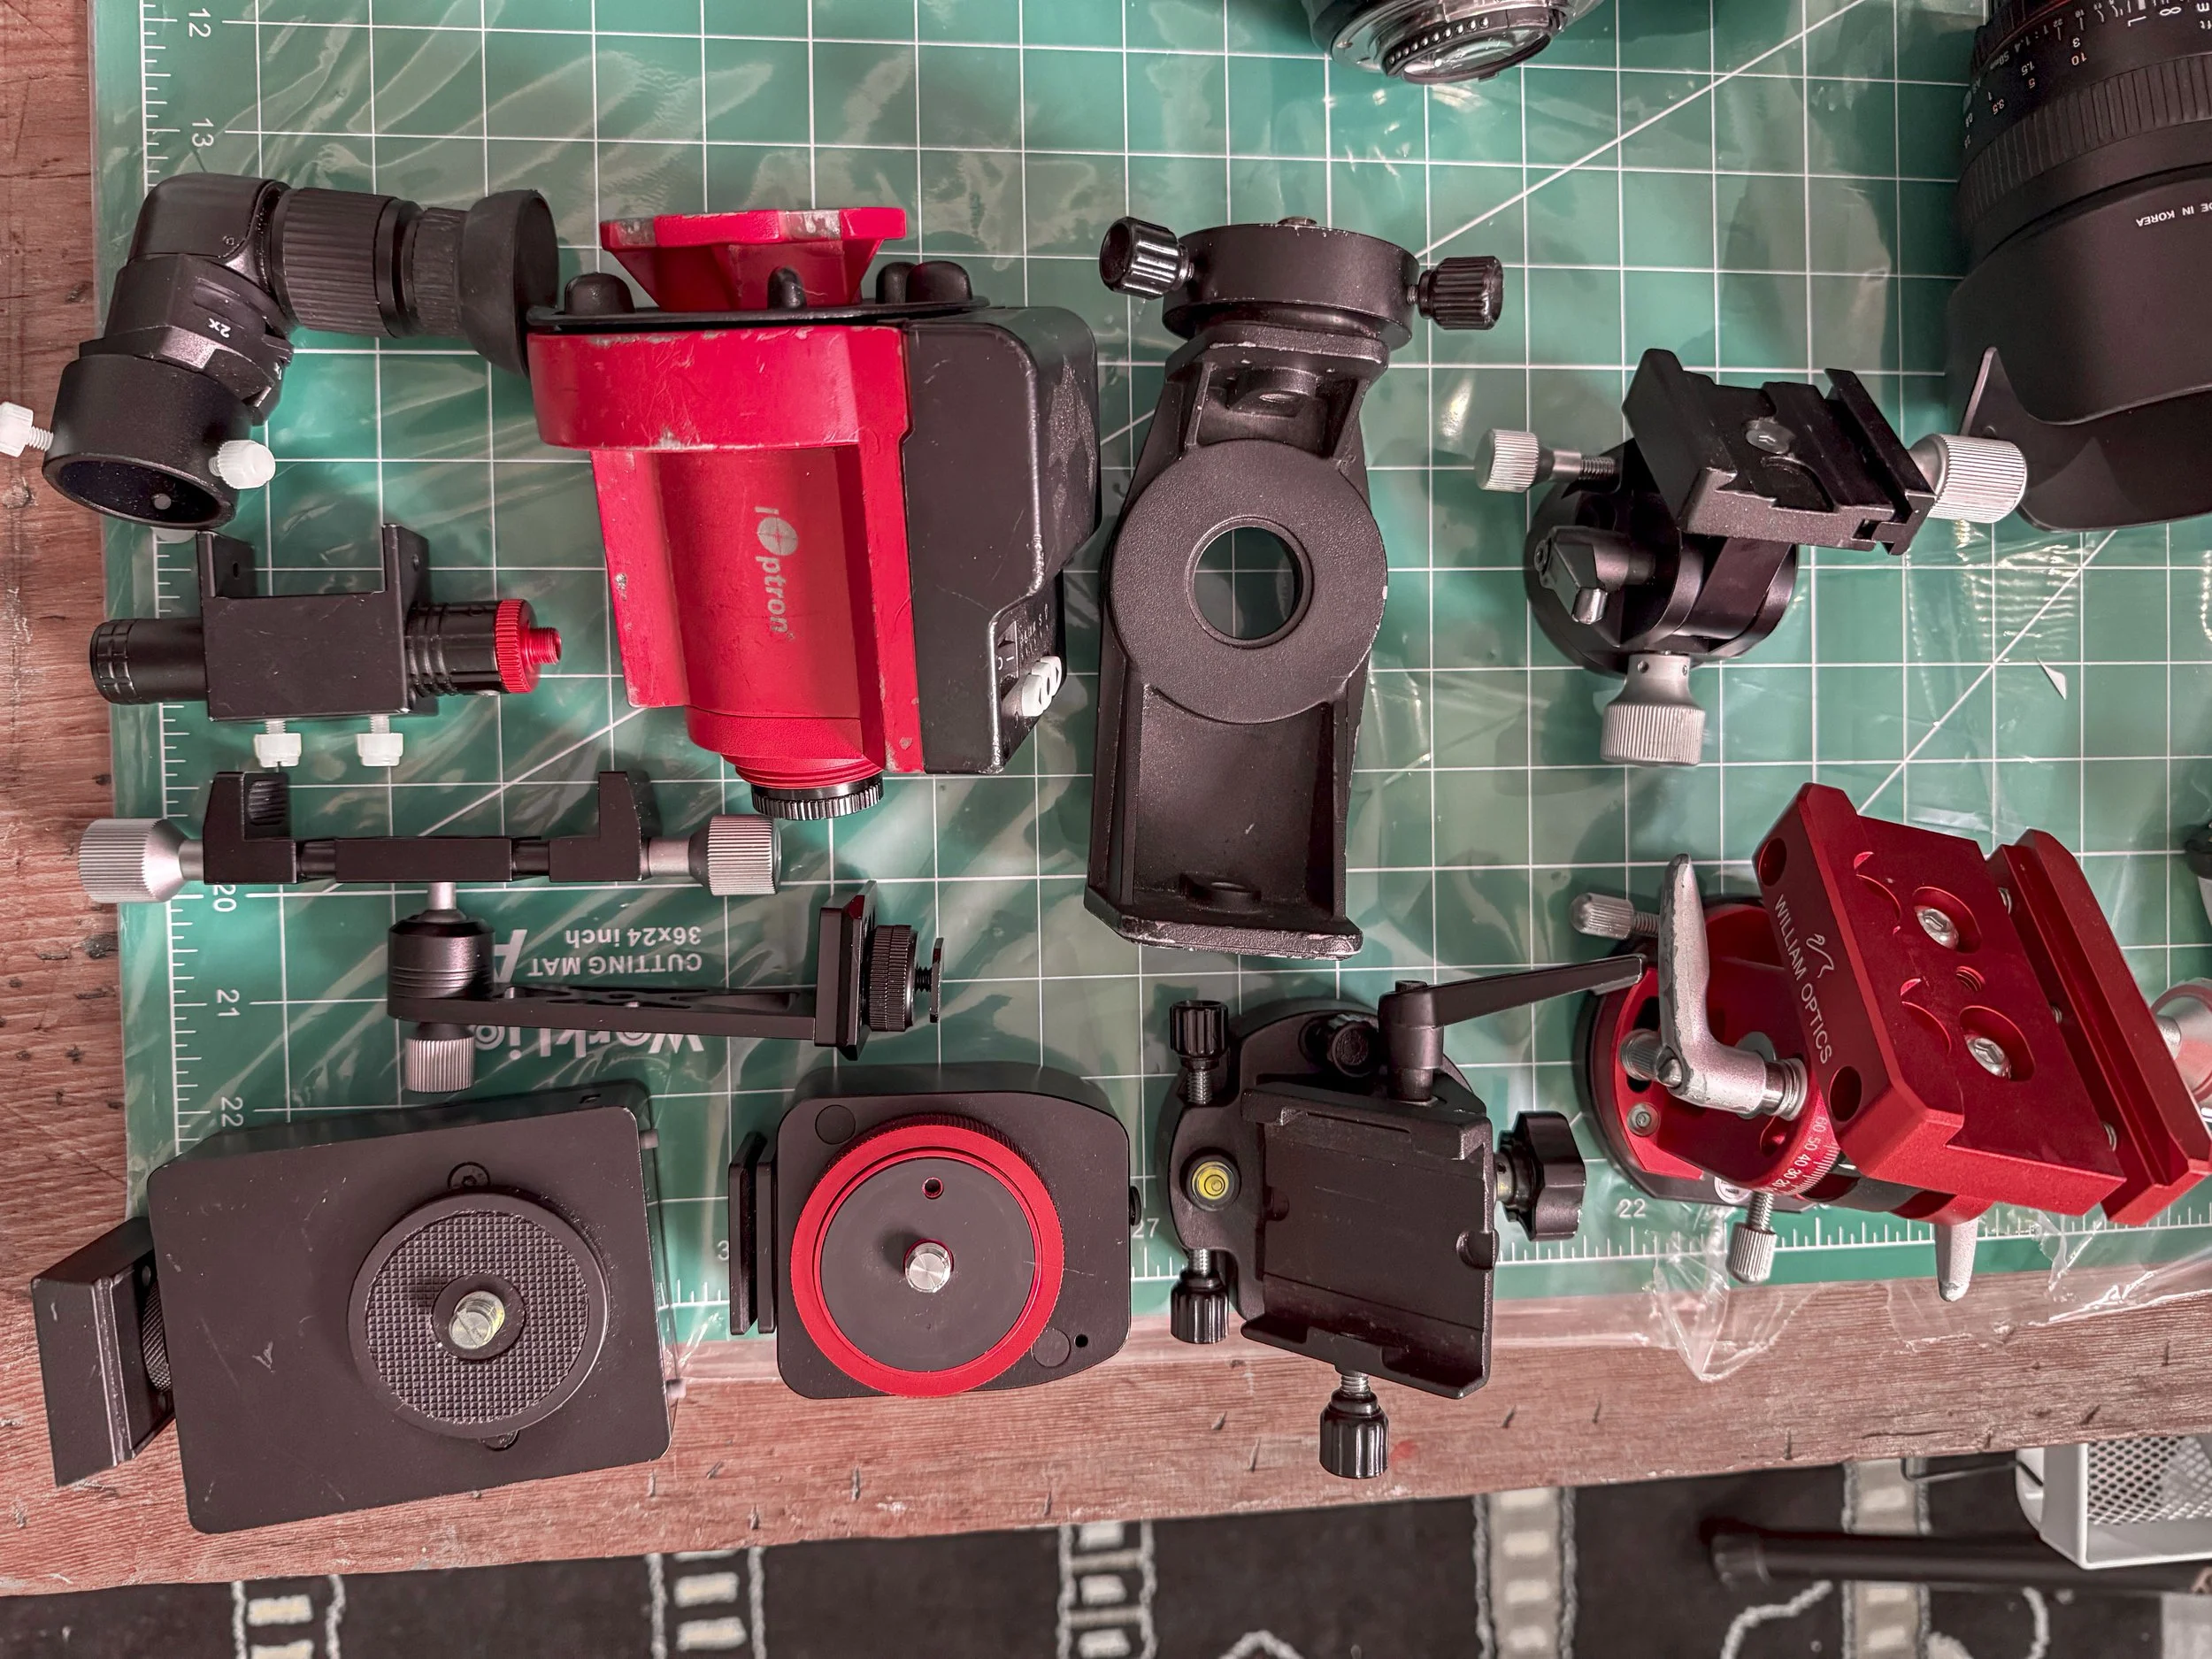
Yes, these are all tracked. Untracked, 120 seconds at 28mm gives you trails, not stars.
But the 8” and 15” look no different than they would un-tracked.
That doesn’t mean go buy a tracker. I don’t recommend my Milky Way Magic students start tracking immediately, that’s a good way to find a different hobby.
Tracking is not the entry point.
It is the next room.
It only pays off once you already know how to find your target, plan your shot, nail focus in the dark, and read your own histogram. Without those, a tracker just adds complexity and cost.
That order is not a gate. It is a sequence, and the good news about sequences is that you can start at the beginning tonight with the camera you already own.
Where to start?
The gap between your Milky Way photos and the ones that stop you scrolling is often not a gap in gear. It is a gap in light, and in knowing how to collect and manage it.
That is what the Milky Way Photography Intensive is for.
It starts August 19, and we cover finding and planning your shot, dialing in settings and focus, and editing a RAW file start to finish.
The foundation that makes everything after it, tracking included, actually work.
You do not need better gear. You just need to begin.
Sign up » Milky Way Photography Intensive
For the pixel peepers:
All images were shot on a Nikon Z6 II with h-alpha mod, Sigma 28-45mm f/1.8 DG DN Art with Capture the Atlas filter
f/1.9, ISO 800. Exposures at 8, 15, 30, 60, and 120 seconds.
Crops at 100%.
No noise reduction applied.
If you want things like this sent to your inbox, this is my weekly newsletter. It’s as close as we can get to standing on a hill in the dark, chatting, while our cameras click away.
Read more blog posts:


Same camera, same lens, same ISO, same sky. The only thing that changed was shutter speed: 8 seconds to 120. See the difference at 100%, and why high ISOs aren’t always the answer.